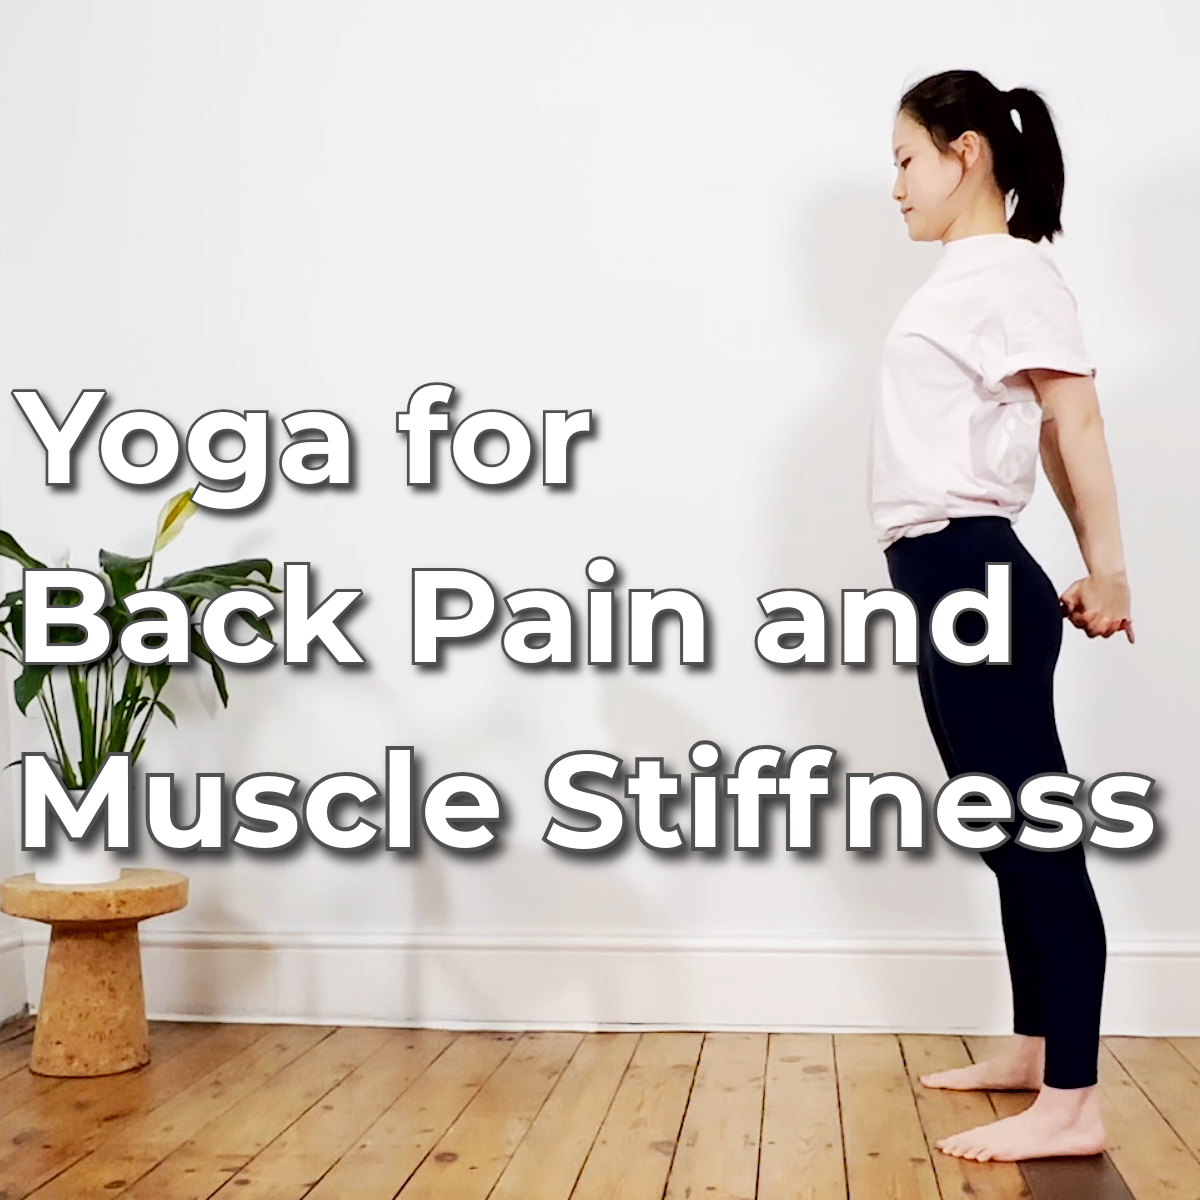
Yoga for Back Pain & Muscle Stiffness: A Daily Beginner Hatha Yoga Practice
Poor posture and long hours at a desk are a common cause of back pain and muscle stiffness
Lower back pain caused by muscle tension and stiffness is one of the most common issues I see in my teaching. However, where it actually shows up is different for every student.
Sometimes it is one specific spot. One of my students, for example, feels her lower back pain concentrated entirely on the right side. Other times it is a combination, such as upper back pain on one side and lower back pain on the other, occurring at the same time.
In yoga therapy, back pain connected to muscle tension is one of the most common cases I work with. With consistent practice, most students see noticeable improvement within about three months. In my teaching experience, students dealing with back pain benefit most from a solid foundation in beginner yoga poses, built around their daily habits, movement patterns, and body proportions, and tailored specifically to what their body actually needs. Combined with a regular practice schedule and proper breathing technique, I have seen no shortage of students genuinely resolve their back pain through yoga.
Note: this article refers specifically to back pain caused by muscle tension or overuse. Every student completes an assessment class with CloudC Yoga Education before enrolling, to confirm the practice is a good fit.
3 Beginner Yoga Poses to Practise Every Day for Back Pain
Below are three beginner yoga poses that work together to relieve tension across the areas most connected to back pain. You can practise these three poses daily on their own, or follow along with the 10-minute yoga video further down this page.
If your back pain comes from long-term overuse or weak muscles, working through our private online yoga classes is a more direct way to address what is actually causing it, based on your specific condition.
These three poses are beginner-friendly variations built on foundational Hatha yoga postures, designed to be easy for beginners to pick up.
If you would like to learn the traditional versions of these poses and understand the reasoning behind the practice in more depth, you can sign up for our newsletter to receive the latest course updates.
Note: if you have high blood pressure, low blood pressure, diabetes, or any other health condition, please check with your doctor before beginning this practice.
Pose 1: Standing Cat Cow (Marjaryasana-Bitilasana Variation)
Steps:
Stand with your feet slightly wider than hip-width apart.
Inhale, open your arms out to the sides at 90 degrees, open your chest, and look upward.
Exhale, round your back, straighten your arms, and stretch through your spine.
Repeat five to ten times, following your own breath.
On your final round, pause for a moment before slowly returning to standing.
Benefits:
This is one of the foundational poses we use specifically for back pain. Moving the spine between these two positions gradually releases the tension and stiffness that build up from long hours of sitting and poor posture. As you practise, bring your attention back to your breath and your spine.
This pose works especially well for students who feel pain across the upper, middle, and lower back at the same time, and it is one of the basic movements we rely on in our beginner Hatha yoga teaching to relieve muscle-tension-related back pain.
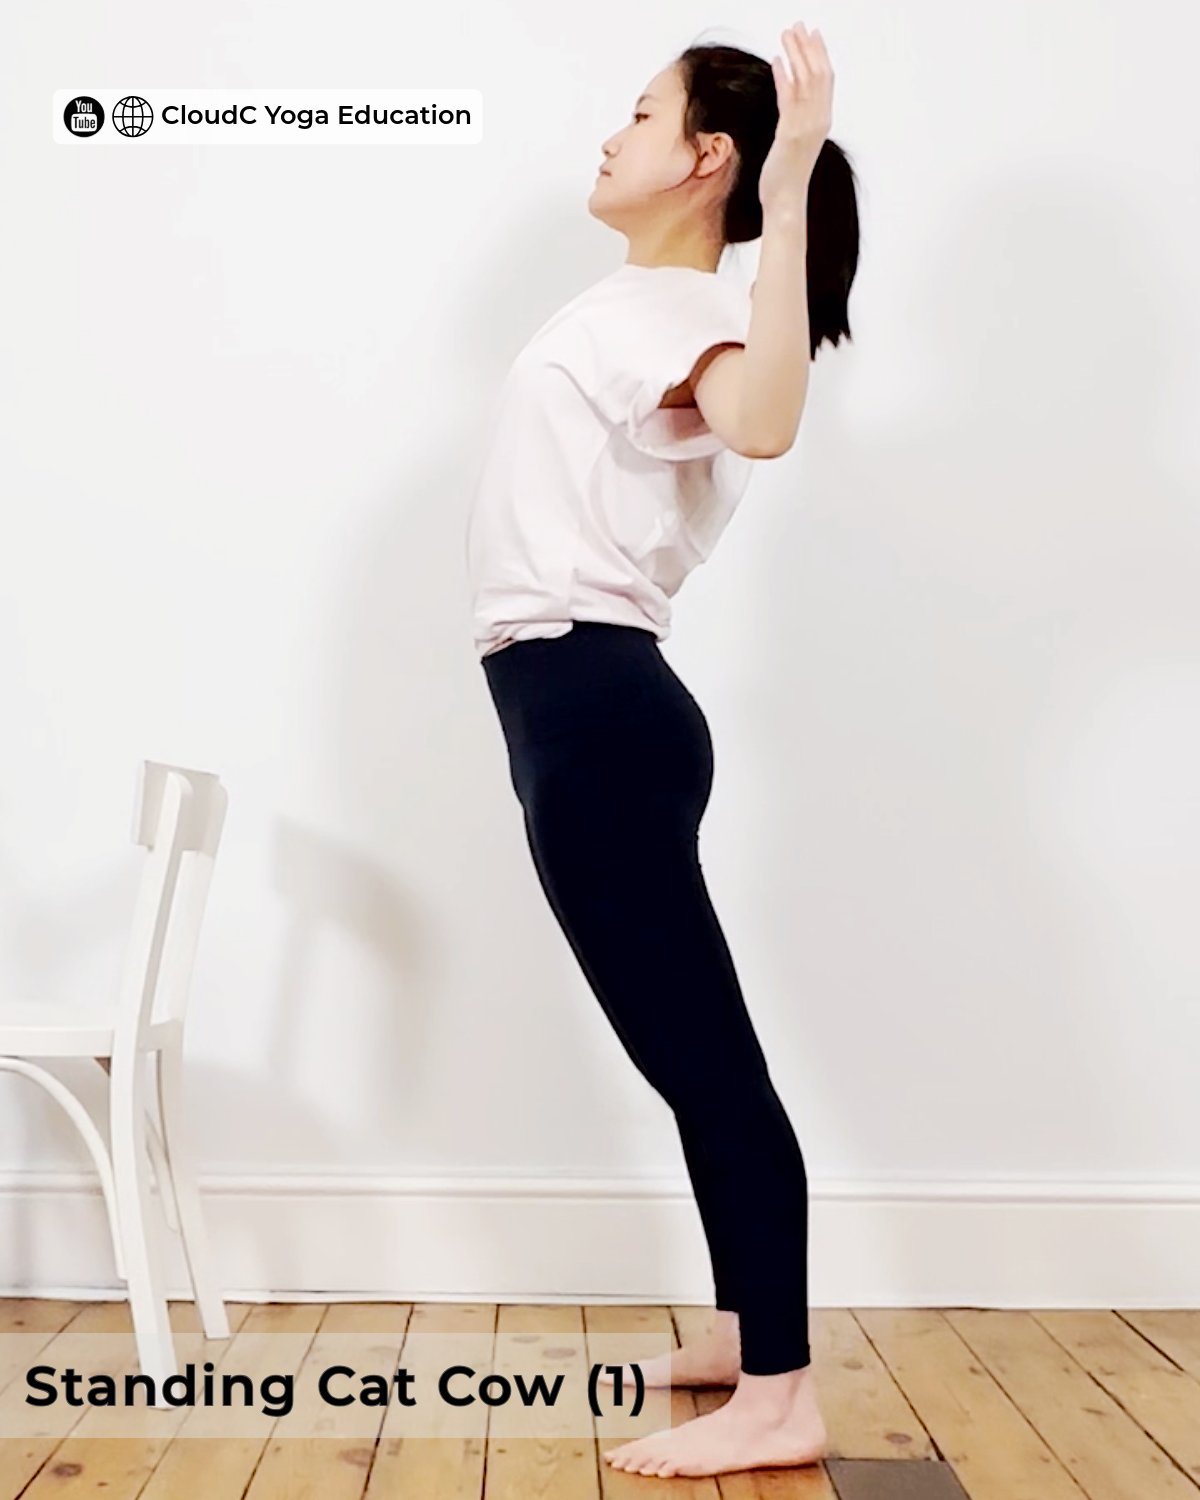
Inhale, open the chest and look up.
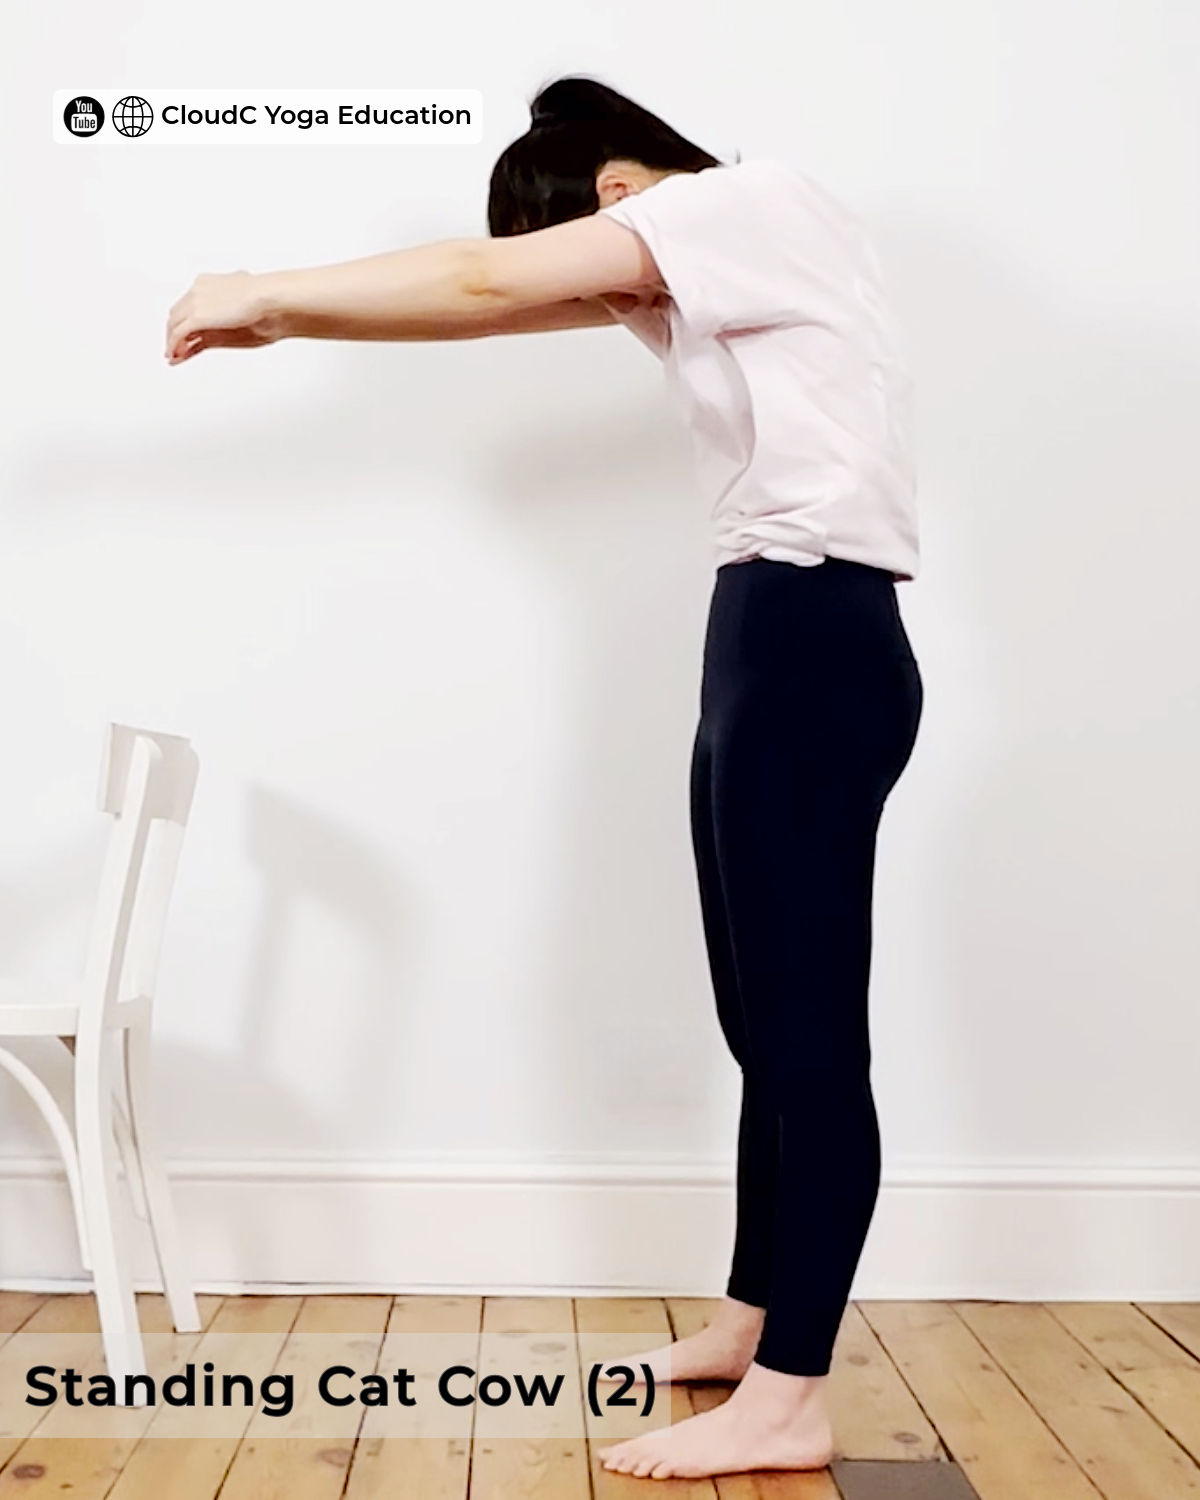
Exhale, round the back and stretch through the spine.
Pose 2: Interlace Fingers at Back Forward Bend (Uttanasana Variation)
Steps:
Stand tall, clasp your fingers together behind your back, and gently roll your shoulders back.
Slowly fold forward into a standing forward bend.
If possible, bend your knees as much as needed so your belly rests against your thighs, which helps your spine stretch more effectively.
Once you are in the forward bend, gently sway your body from side to side to relax further.
Hold the forward bend for 5 to 10 breaths, letting blood flow return to this area and giving your mind a moment to settle.
When you are ready, look upward and slowly rise back to standing.
Benefits:
Combining a forward bend with clasped hands opens the shoulders while stretching the neck, shoulders, and lower back at the same time. This is especially helpful if you sit at a desk for long hours and deal with tight shoulders or lower back discomfort.
It also releases both the physical tightness in your body and the thoughts you have been holding onto. This is one of the key movements in our teaching system for relieving pain while calming the mind.
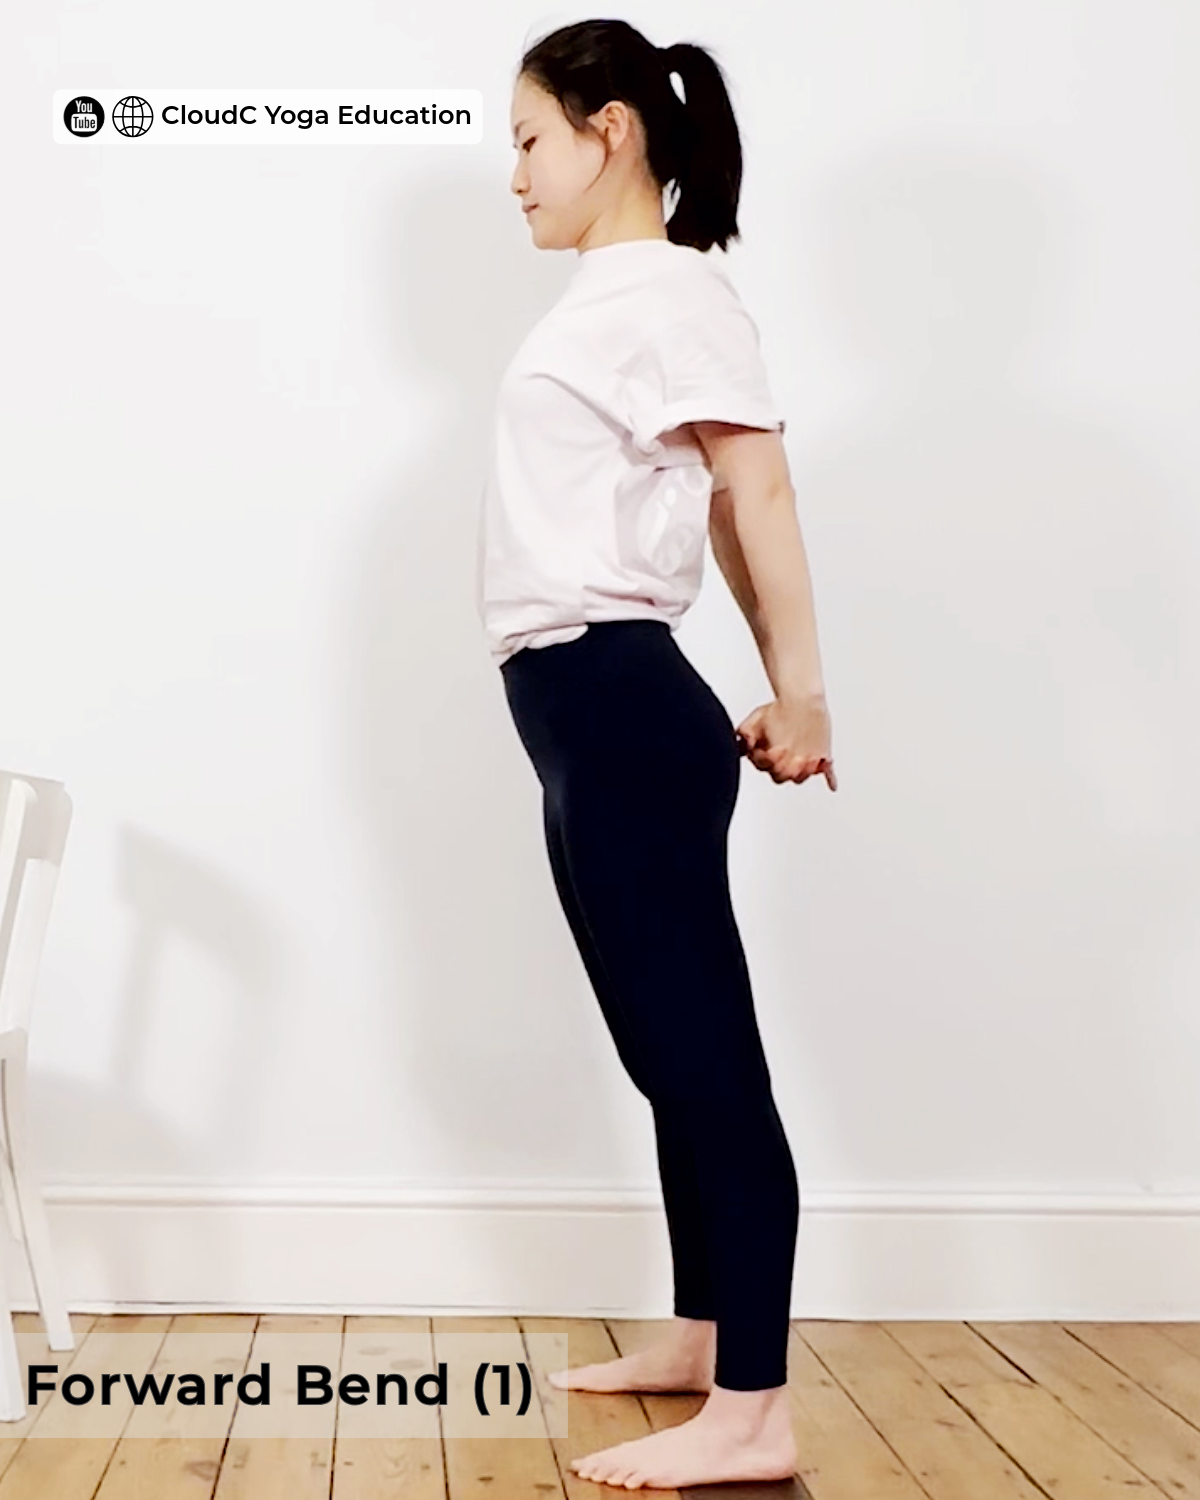
Clasp your hands behind your back and gently roll your shoulders back.
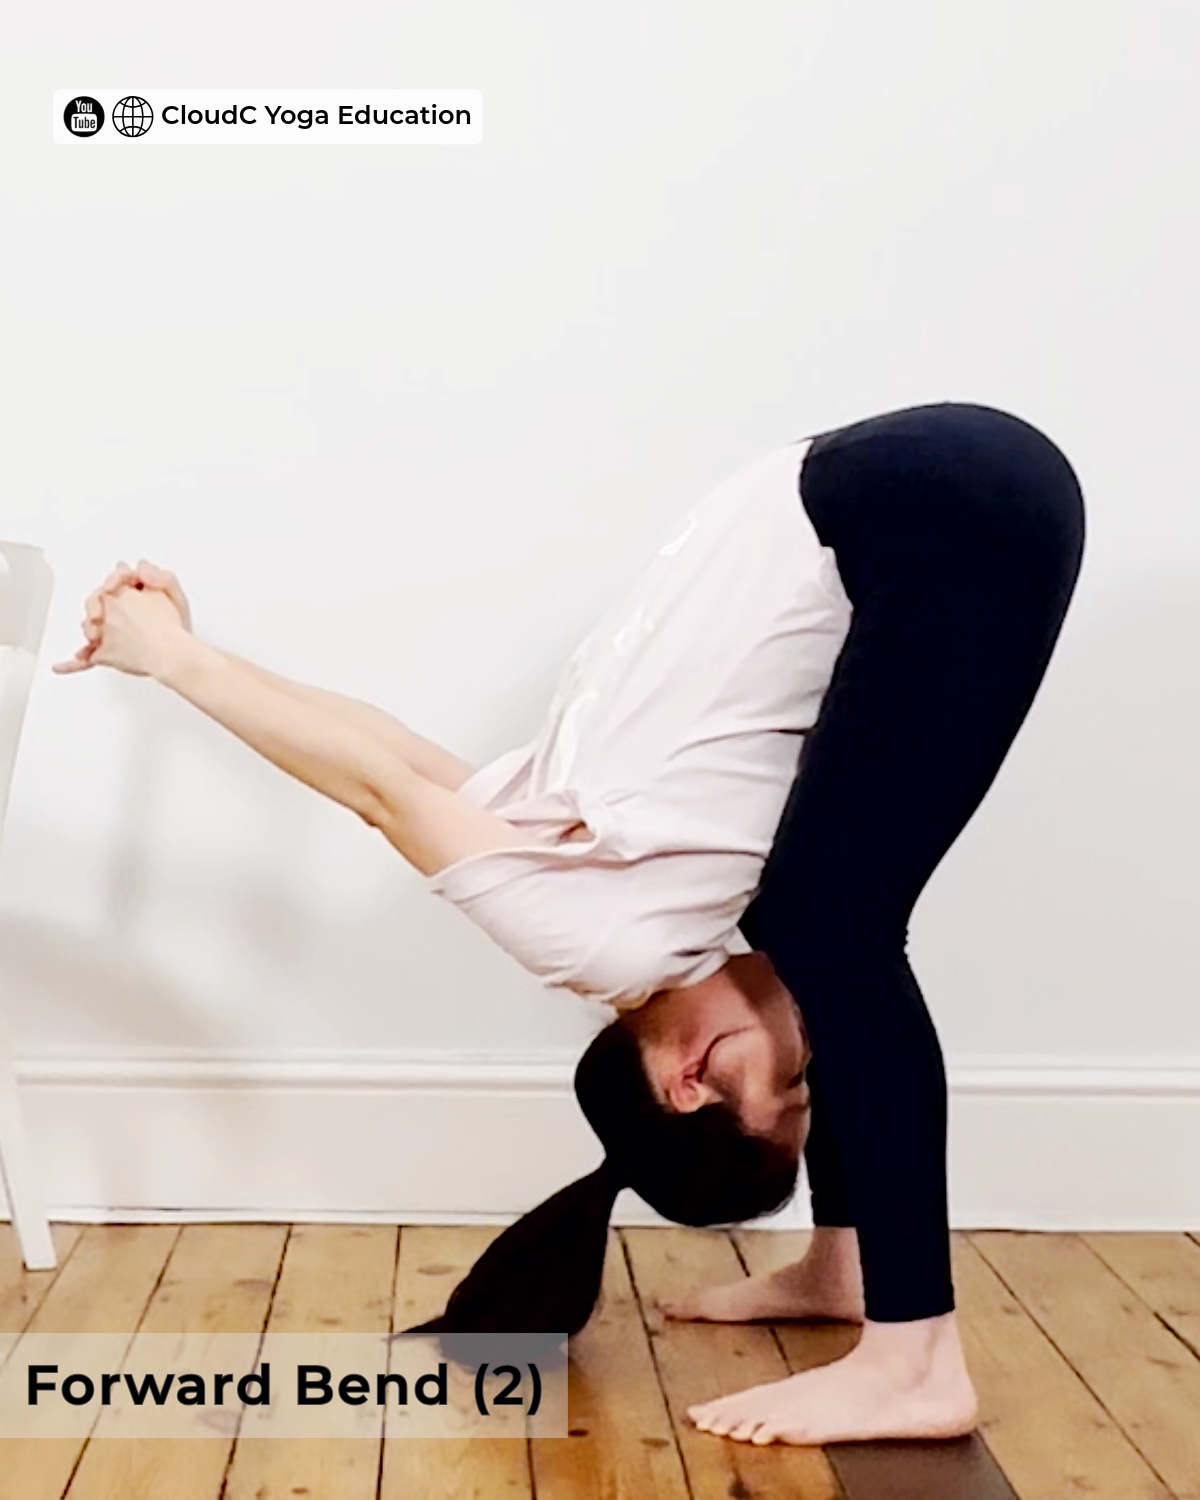
Fold forward, letting your hands lift behind you to stretch the shoulders and lower back.
Pose 3: Standing Side Bend (Ardha Kati Chakrasana Variation)
Steps:
Stand with your feet apart.
Inhale and raise your right arm overhead; exhale and lean your body to the left, feeling the stretch along your right side.
On your next inhale, bring your right arm and body back to standing.
Exhale and switch sides.
Inhale and raise your left arm overhead; exhale and lean your body to the right, feeling the stretch along your left side.
Repeat five to ten times, following your own breath, and notice where you feel the stretch.
Benefits:
This side bend creates space through the upper body and sides of the waist. It is especially effective for back pain concentrated on just one side, whether that is the right or left lower back.
It also helps the muscles involved in breathing gain more range of motion, making your breath feel smoother and easing your mood. This is a key part of our beginner yoga pose series for addressing uneven, one-sided back pain.
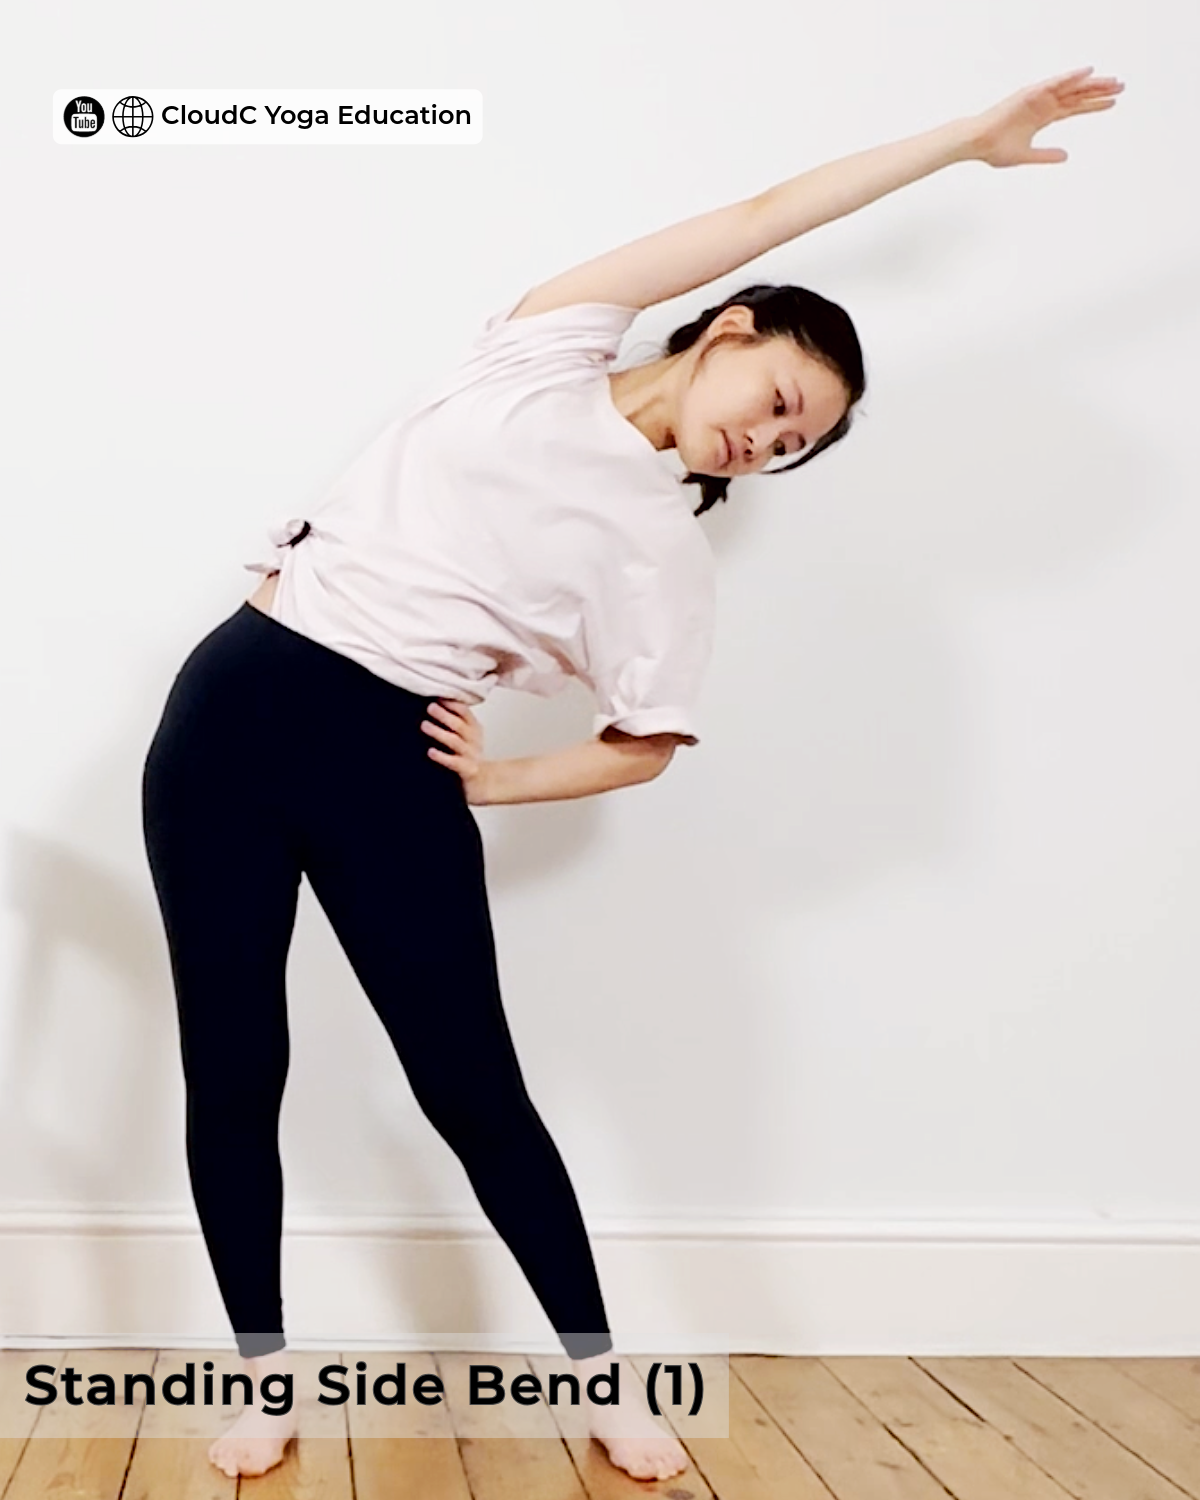
Raise your right arm overhead and lean to the left to stretch your right side.
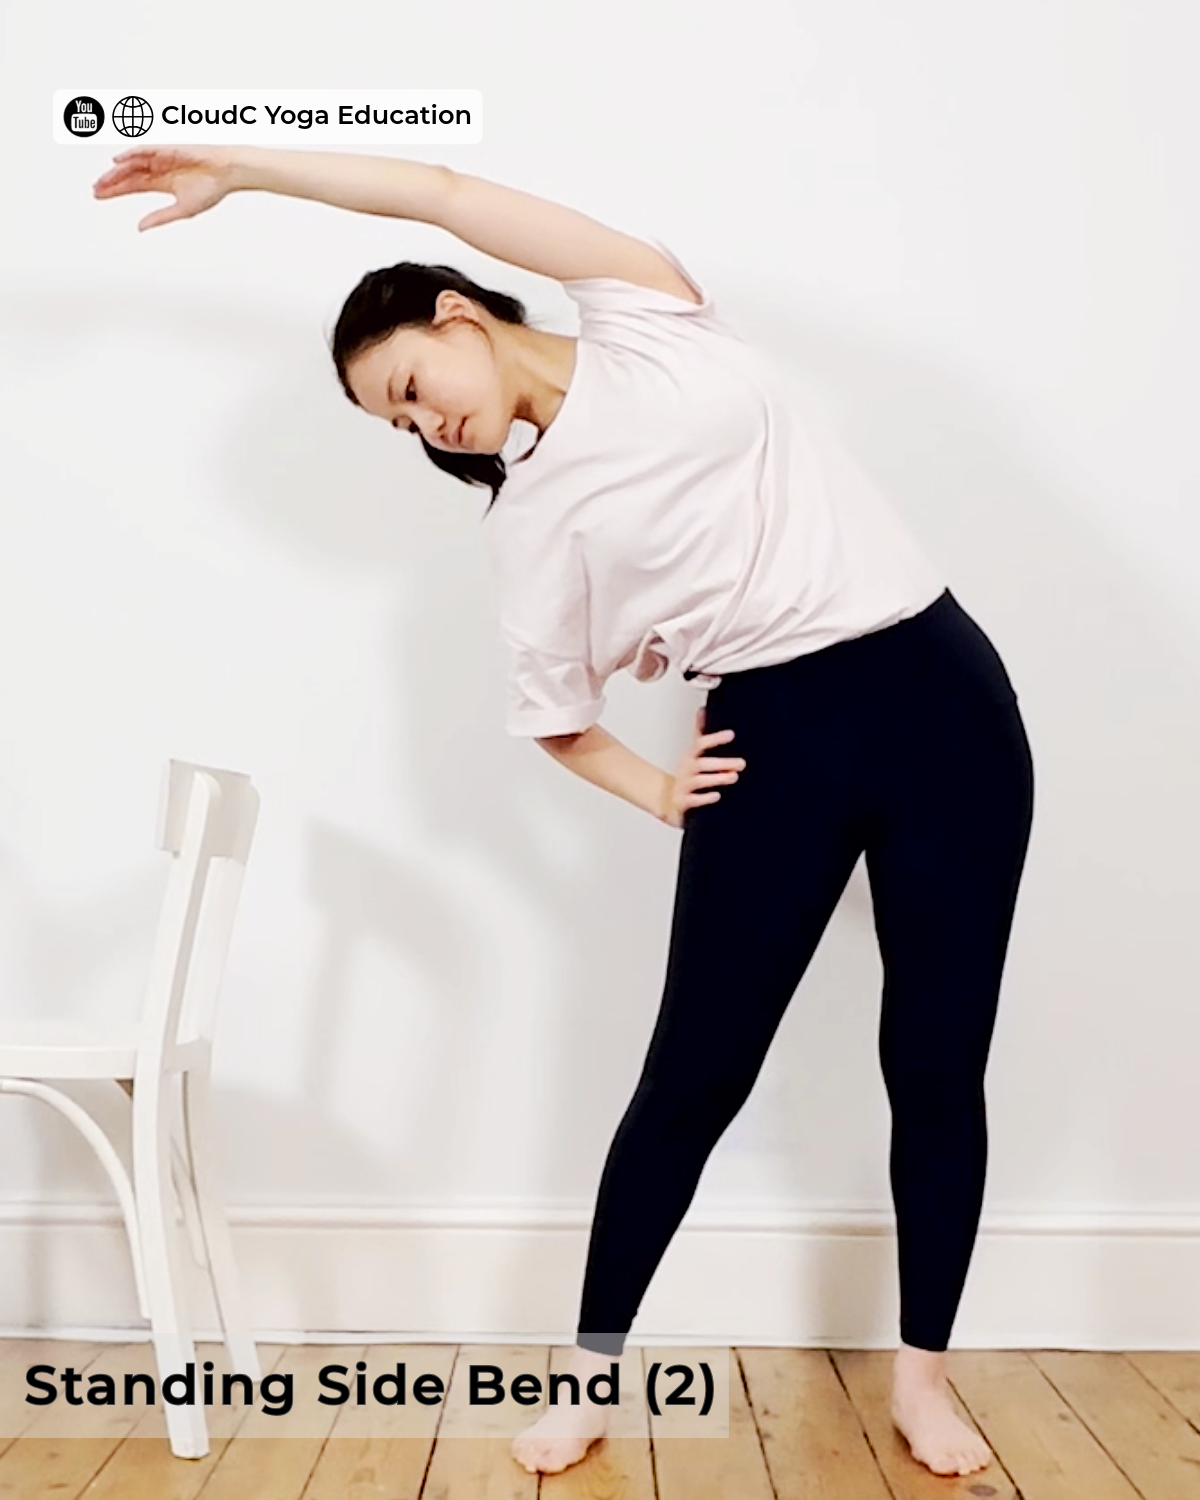
Raise your left arm overhead and lean to the right to stretch your left side.
Follow Along: 10-Minute Yoga Video
You can follow these three poses step by step in our 10-minute yoga video. This practice is ideal if you sit for long periods, deal with tight shoulders, or experience back discomfort. All you need is a sturdy chair with a backrest. No yoga mat or blocks required, so you can practise anytime, anywhere, to release tension in your body and ease back pain and muscle stiffness.
Start Today: A Daily Practice to Free Yourself from Back Pain
Improving back pain and muscle stiffness is never something that happens overnight. It comes from small, consistent effort built up day by day. Here are a few reminders to help you bring what you learned today into your daily life:
Avoid staying in the same position, whether sitting or standing, for more than an hour. Get up and move around, take a bathroom break, or do a few simple stretches so your body has a chance to reset and reduce the buildup of muscle tension and stiffness.
Set aside 10 to 20 minutes each day for beginner yoga to gradually release built-up tension. This is a daily recovery habit we consistently emphasise with our students.
Improving back pain takes time. With consistent practice over three months or more, you will start to genuinely feel the difference and let go of pain that has been bothering you for a long time.
Back pain caused by poor posture and long hours of sitting can genuinely be improved through a consistent, tailored beginner yoga practice. All it takes is committing to start today and giving yourself a little time to practise each day. Like many of our students, you too can work through back pain and come out the other side through yoga.
About CloudC Yoga Education
CloudC Yoga Education offers a structured beginner Hatha yoga course, tailored to each student's physical and mental state, body proportions, and specific pain condition, so every student gets exactly the practice they actually need.
Sign up for our newsletter to receive the latest teaching and course updates, or subscribe to our YouTube channel to build a home yoga practice.