Your Custom Text Here
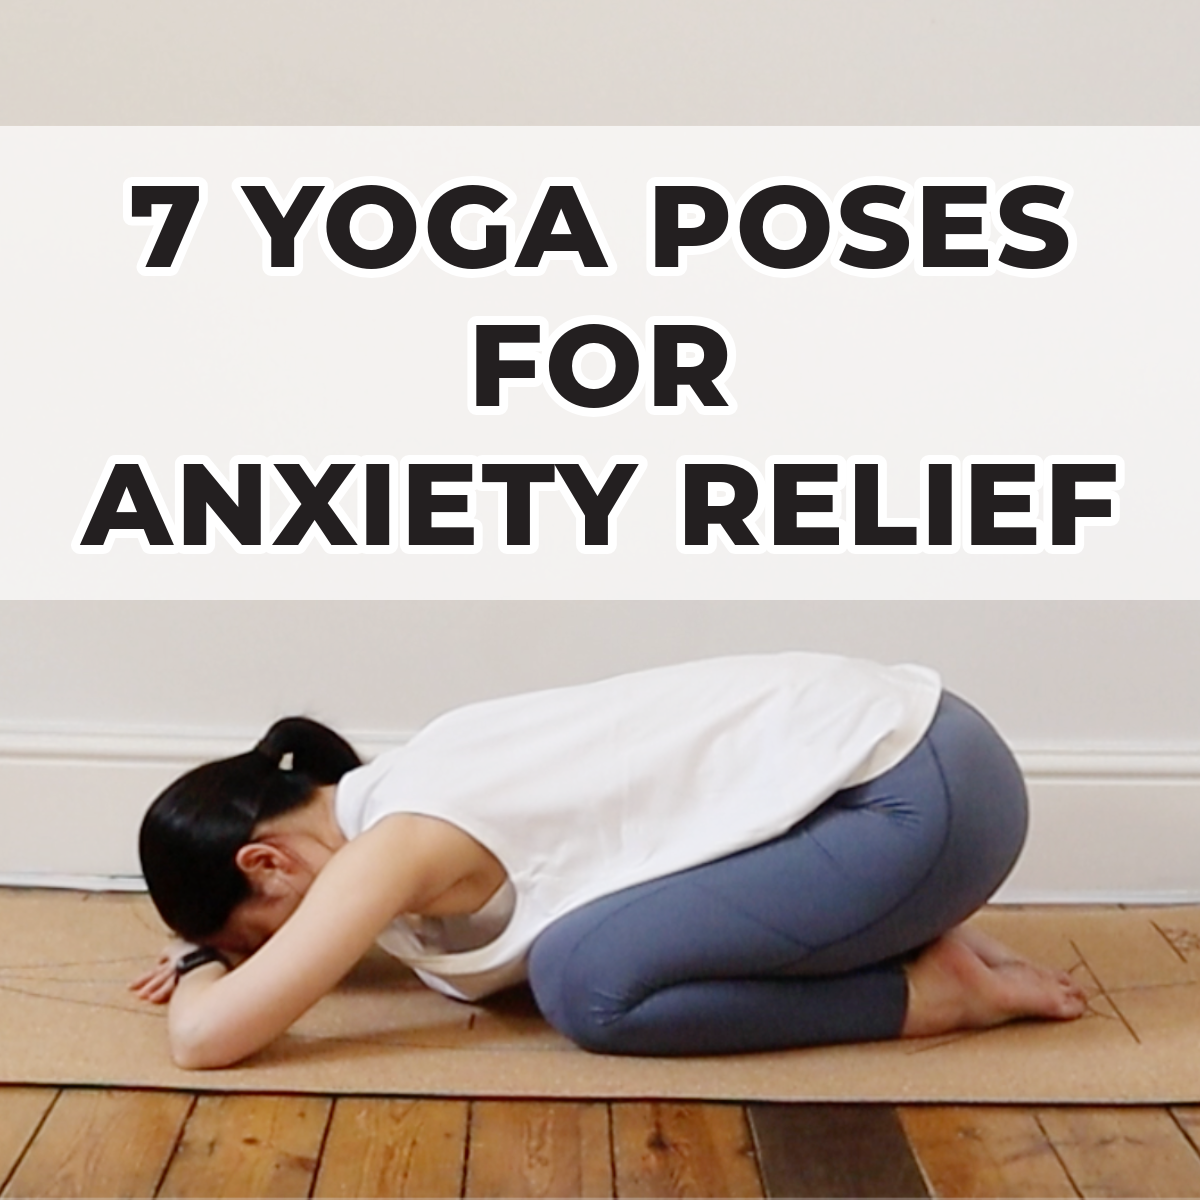
A Simple Yoga Practice for a Busy, Anxious Mind
Learn to turn inward with a gentle yoga practice designed to ease an anxious mind. In 25 minutes, create space in your body and experience a peaceful release.
Yoga Practice For Days When Your Mind Is Overwhelmed
Welcome, whether you find this article with a racing anxious mind or are searching for peace of mind. We hope you find a moment of relief in this calm and healing yoga space - CloudC Yoga.
We understand how ironic it sounds to be unable to control your own mind. Sometimes the mind is so packed with lingering thoughts that it never shuts down. Even simple daily life can be hard to get through with persistent worry, racing heartbeat, rapid breathing, and more.
Remember, whenever the mind becomes busy and anxious, you are not crazy. Never doubt yourself. Notice that the complexity of the mind makes us human. When you learn to study your mind and understand your thought patterns, moments of feeling controlled by your thoughts begin to fade.
Letting Go of the Weight You Carry
Yoga is a beautiful companion while we experience life's highs and lows. No one can escape the reality that we all have to wear different hats and take on different responsibilities. Being capable can also be overwhelming.
Ask yourself, when was the last time you truly turned inward, nurturing your body and mind without engaging in responsibilities or standards you are trying to live up to?
Yoga doesn't ask you to be anything but yourself. Roll out your yoga mat, breathe, and do simple stretches. Connect with your body and mind. Your mind, body, and soul deserve your loving care.
Your 25-Minute to Find Calm with Yoga
Starting with just 25 minutes a day or a week is all your mind and body need. Slow down and find your peace.
Cat-Cow & Child's Pose: Allow the rhythm of your own breath to guide the movement of your spine. In Child's Pose, the goal is to feel the breath expanding into your back and feel the body soften and sink a little deeper.
Thread the Needle: Let go of all the heavy weights on your shoulders and your neck, and just breathe. Take this pose for a moment of physical and emotional release.
Sphinx & Cobra: Opening the heart and choosing the version that feels good for you. A perfect backbend isn't the goal. Gently opening the space around your chest is.
Seated Forward Bend: The Forward bend is the best pose to turn inward, just as if you are having a gentle conversation with your body. The stretching sensation is where our body sends a message from an area that's holding on to tension and is ready to release it. As we create space, we get to experience a peaceful release.
Savasana: Our body, mind, and soul are all connected. So when we feel uneasy or anxious, our body also becomes tight. Allow savasana to be your final peaceful rest.
Carry Peace with You
When we take care of our bodies, we also take care of our minds and souls.
Ask yourself, "How do I feel right now?" Sometimes all it takes is a moment of "slowing down." As you slow down, so does the mind.
Remember, you truly deserve to feel this peace.
Ease Neck and Shoulder Pain: the Eagle Arm Pose
Are you dealing with persistent neck and shoulder tension from your modern lifestyle? Learn the simple yet powerful Eagle Arm Pose. This daily stretch is key to easing pain, releasing tightness, and finding mental calm before sleep.
It's excellent for releasing tightness right out of your shoulders.
We spend long hours at desks, commuting, or on our phones. Staying in one position causes shoulder and neck tension.
Here's the good news: letting go of shoulder pain is simpler than you think. We can always add simple stretches throughout our day.
Today, we're going to dive into a simple yet powerful pose: The Eagle Arm Pose. It's excellent for releasing tightness from your shoulders. Plus, it’s a wonderful tool when you feel mentally stressed.
Steps for the Eagle Arm Pose (Garudasana Arms)
Here are the steps of getting into the Eagle Arm Pose. Alternatively, you can practice along with our yoga video (scroll down to watch).
Start by extending both arms forward to shoulder height.
Gently cross your right arm over your left.
Wrap your arms around until your palms meet. (Don't worry if they don't touch perfectly.)
Lift your elbows up to shoulder height.
Relax your shoulders away from your ears. Feel your shoulder blades slide softly down your back.
Settle into the final pose and stay here for about 5–10 deep breaths.
When you're ready, gently unwind.
Repeat the same steps on the other side.
Full length video for shoulder and neck tension release.
Practice Daily for Healthy Shoulders
Consistency is necessary for healthy, pain-free shoulders. Think of this as your daily self-care ritual.
Try scheduling a little time for the Eagle Arm Pose every day. It's especially helpful after long hours of desk work or after holding the same pose for a while.
Another great time to practice is right before bed. It helps you release any tension in your body and eases mental stress. This simple routine can prepare you for a good night's sleep.
When you feel ready to go a little deeper, I invite you to try the full-length neck-and-shoulder release video.
Conclusion
Releasing shoulder tension and pain is so much easier than you imagine. Remember, a little bit of daily care, like the Eagle Arm Pose, goes a long way.
Incorporate this simple stretch into your life and feel the beautiful difference! You deserve this space and ease.
Relief Insomnia with Yoga and Meditation
Struggling with sleep or insomnia? Explore how yoga and meditation offer a powerful, natural path to relaxation and rejuvenating nights.
A subscriber recently shared her struggle with stress, tension, and trouble sleeping. While medicine can help, yoga and meditation offer lasting solutions.
Before we look at the solution, it's important to recognise that disrupted sleep and insomnia are rarely caused by a single factor—lifestyle choices often have an important role.
“When the body relaxes, the mind follows.”
Your Lifestyle Choices Matter
Night Routine
Do I have a calming sleep routine?
Our bodies need clear signs to know when it is time to rest. This is not only about going to bed earlier, but about implementing lifestyle changes which match your body's natural rhythms.
Ask yourself, can you make adjustments with the following lifestyle choices?
Caffeine: Do I overconsume? Do I allow a 10-hour window before sleep?
Diet: Do I maintain a nutritious, balanced diet?
Mental Wellbeing: Do I make peace of mind a priority?
Work: Am I working just before bed?
Night Routine: Do I have a calming sleep routine?
Relax Physical Body Before Sleep With Guided Body Scan Meditation
Drawing from yogic physiology, we understand that humans are composed of five subtle bodies or sheaths – the Five Koshas. The outermost layer, the Annamaya Kosha, is our physical form.
Restful sleep begins with physical awareness. Our 60-minute body scan meditation guides you to relax muscles and ease tension step by step.
When the body relaxes, the mind follows, signalling to the nervous system it is safe to sleep and recover.
Practice this meditation nightly to help you relax before bed. Gradually reduce frequency as falling asleep becomes easier.
Conclusion
Yoga and Meditation can certainly help relieve insomnia. However, we should never neglect the value of lifestyle choices. The key to having a good night's sleep is to pair a balanced lifestyle with regular relaxation techniques.
Subscribe to CloudC Yoga Newsletter for more yoga and meditation insights.
Deepen Your Practice In Two Steps
1️⃣ Join the Newsletter: Monthly Newsletters & class updates.
2️⃣ Subscribe to YouTube: Weekly Yoga and Meditation Video Updates.
Winter Yoga for Longevity: The Ancient Chinese Wisdom of "Conserving Energy"
Discover the Ancient Chinese Wisdom of Bi Zang (Conservation) and how to adjust your winter yoga practice for true longevity and energy deposits. Learn the 20-minute daily secret.
TCM & Yoga: Aligned with Nature's Rhythm
My path of yoga has always been intertwined with the wisdom of Chinese Longevity.
Growing up, I was deeply inspired by my uncle, a Chinese Traditional Medicine (TCM) doctor, who used the Ancient Chinese Wisdom of aligning ourselves with nature's rhythm to heal many.
That simple truth is what drew me to find so many beautiful similarities in the practice of yoga, especially as we approach winter.
If you are concerned about your long-term health and wellness, about longevity, then winter is arguably the most crucial season for self-care. It's not the time to "push" but to "preserve.
Winter's Secret to Longevity: The Wisdom of "Bi Zang":
the seasons are linked directly to human health.
In ancient Chinese wisdom, as documented in the Huangdi Neijing (The Yellow Emperor's Classic), the seasons are linked directly to human health.
Winter is the season of "Bi Zang" (閉藏), which translates concisely to "to close and to conserve".
Think of your entire year as an "Energy Bank Account":
Spring is for planning.
Summer is for executing.
Autumn is for harvesting.
Winter is the dedicated time for making your most important "deposits": conserving the energy that will power you through the year ahead.
This is the key to building the inner resilience necessary for true longevity.
Golden Rules for Winter Longevity
The Huangdi Neijing offers two direct principles for how to make these vital energy deposits:
1. Adjust Your Daily Rhythm: Sleep is Your Savings Account
When the days are short, your body needs to prioritize rest to enter its deepest repair mode.
“Go to bed early, rise late.”
The goal of "rise late" is to wait for the sunlight before you get active.
The Main Caution: Avoid early morning activity in the cold and dark. Doing so forces your body to expend precious energy (Yang Qi) just fighting the cold, like making an immediate withdrawal from your savings.
2. Adjust Your Practice: Conserve, Don't Consume
This principle is embodied by the concept of "Wu Xie Pi Fu" (無泄皮膚).
In simple terms: heavy sweating depletes your energy reserves. Intense, hot, or strenuous exercise is seen as a "withdrawal," not a "deposit". For a longevity-focused practice, the goal is to nourish, not consume.
Applying This Wisdom to Your Winter Yoga Practice
This shift in perspective is easy to apply to your yoga routine:
1. Before Your Practice: Seek the Warmth
Cozy Up Your Space: Create a cozy, warm environment for your practice.
Cover Up: Wear socks, long sleeves, and avoid shorts or tank tops to prevent your body from getting cold. This allows your body to practice in its most comfortable and natural state.
2. During Your Practice: Nourish, Don't Challenge
This is the ideal time to focus on Restorative Yoga or Gentle Yoga.
Shift your intention from challenge or intensity to conserving and nourishing.
Consistency over Length: Remember that 20 minutes of daily practice is far more beneficial than an occasional 60-120 minute session.
3. After Your Practice: Seal in the Warmth
Stay Warm: Keep yourself covered and warm immediately after your session.
Nourish Inside: Consider a warm drink, like ginger and date tea, to nourish your body from the inside out.
Keep yourself warm immediately during and after your session.
Your Winter Practice: 20 Minutes Daily
Practice isn't about length, but consistency.
Based on the wisdom of longevity, commit to a 20-minute daily practice. Prioritize either nourishing gentle yoga or body meditation.
Find these two 20-minute nourish practices from our yoga library below:
20-Min Body Scan Meditation for Recharging
Gentle movement for de-stressing the body and mind.20-Min De-Stress Gentle Stretch
Deep relaxation to recharge your vital energy reserves.
Deepen Your Practice in Two Steps
1️⃣ Join the Newsletter: Monthly Newsletters & class updates.
2️⃣ Subscribe to YouTube: Weekly Yoga and Meditation Video Updates.
My Journey to Flexibility: Using the Front Splits to Heal Your Lower Back
The front splits might seem out of reach, a pose reserved for dancers or gymnasts. However, the journey of practising the splits is one of the most effective and healing methods for releasing the chronic tightness and pain stored deep in our hips and lower back. Practice is not about forcing your body into a perfect pose, but rather a calm and patient process of self-discovery. In this article, I share a series of preparatory poses to help you slowly create space and begin your own healing journey.
Have you ever thought you could have a more flexible, pain-free body? I'm Cloud, and like many people, I wasn't born with a naturally flexible body. I want to share my little story with you first.
When I took dance classes in primary school, I was one of the students the teacher had the least hope for. While every other student could easily do the splits, I struggled and couldn't get down. Because of this, when we had competitions, the teacher would put me in the least noticeable position to reduce the chances of our team losing points.
It wasn't until I was at university and happened to see a yoga book in a bookstore that my view on flexibility changed. I learned that in the world of yoga, the emphasis is on the process of practice and the integration of body, mind, and soul. After giving up on stretching for many years, I returned to it. The splits I couldn't do when I was eight years old, I could do more than ten years later, almost without noticing.
The process wasn't about trying to achieve a particular pose. It was about humbly accumulating the work, bit by bit, and peeling away the layers of tightness and stress stored in the body. I'm not sure if you've had the same experience, but I believe everyone can understand the profound joy that comes with having a body that is no longer tight and has more flexibility. It's a delightful feeling for both body and mind.
The front splits might seem out of reach, a pose reserved for dancers or gymnasts. However, the journey of practising the splits is one of the most effective and healing methods for releasing the chronic tightness and pain stored deep in our hips and lower back.
At CloudC Yoga, the core philosophy I want to promote is simple: practice is not about forcing your body into a perfect pose, but rather a calm and patient process of self-discovery. As I say in the video, we are here to "slowly discover our version of the splits through practice."
In this article, I hope to share the front splits practice with you and the deeper meaning behind the yoga practice. In addition to the article, you can follow the video tutorial below to start your journey.
Anatomy Focus: The Key Muscles for the Front Splits
Before we begin stretching, let's first understand the parts of the body we will be stretching. Understanding the muscles you are working on can help you practice more effectively and safely.
Hamstrings - Located at the back of your thighs. In modern life, these muscles are often tight due to prolonged periods of sitting, which is a primary cause of lower back pain. Regular stretching is key to releasing physical stress.
Hip Flexors (especially the Psoas) - Located at the front of your hips, they are responsible for lifting your thigh towards your body. Prolonged sitting can cause the hip flexors to become short and tight, pulling on the pelvis and leading to poor posture and discomfort.
Quadriceps - Located at the front of your thighs. In this practice, they get a deep stretch, which helps promote the health of the knee joint and the flexibility of the entire leg.
More Than a Pose: The Benefits of the Process
Just as in life, when we pursue different goals, the process of getting there often brings us the greatest rewards. The same is true for practising the front splits. Here are a few benefits of practising the splits:
Soothe Chronic Pain: When we stretch the hamstrings and hip flexors correctly, we can address the common tight spots that cause lower back pain and hip discomfort, releasing pressure and improving mobility.
More Freedom in Daily Activities: With increased lower body flexibility, daily activities can also become easier. After consistent practice, you will find that walking and running feel lighter, and even your sitting posture will be more comfortable.
Mind-Body Connection: The front splits are a very deep stretching practice. To practice safely, you must completely listen to your body's signals. In this process, you learn to communicate with your body and understand its messages, enhancing the mind-body connection.
Cultivate Patience: For many people, the front splits are a distant goal, but through consistent practice, many can successfully achieve them. During the period of practice and waiting, you cultivate patience.
Learn to Relax: In my yoga teaching, I often remind students, "As long as the mind is relaxed, the body will follow." You will realise the importance of rest and relaxing your mind in regular practice.
Five Preparatory Poses Before Practising the Front Splits
To safely explore the front splits, there is no need to force the body into the position. Instead, we use a series of targeted preparatory poses to create space in the body slowly. Here are five core preparatory poses that, through regular practice, will slowly open up your body's space and lead you towards the depth of the stretch.
1. Sun Salutation (Sūrya Namaskāra)
The Sun Salutation is a sequence of movements that serves as a traditional warm-up in yoga practice. It's like a morning dance for the body, gently waking up all the muscles and joints, increasing body temperature and blood circulation, and building a safe and stable foundation for the deeper stretches that follow.
Benefits
Gently stretches the whole body, including the hamstrings, hip flexors, and spine.
It also builds a connection between breath and movement, helping to focus the mind and enter a state of practice.
2. Standing Forward Bend (Uttanasana)
The Standing Forward Bend is a fundamental yet extremely effective pose that can deeply open up the tightness in the back of the thighs (the hamstrings). When practising, remember to keep your knees slightly bent, especially for beginners, to protect your lower back and knee joints. Our goal is not for the hands to touch the floor, but to feel the relaxation of the entire back and the stretch in the back of the legs.
Benefits:
Deeply stretches the hamstrings and calf muscles.
Releases pressure on the spine and neck.
Practising forward-bending postures also has a calming effect on the mind and body.
Utthan Pristhāsana
Lizard Pose is a deep hip-opening pose. It can simultaneously stretch the outer hip of the front leg and the hip flexor of the back leg. Depending on your flexibility, you can use yoga blocks to adjust the height and the depth of the stretch.
Benefits:
An excellent hip-opening pose that can effectively improve hip joint flexibility.
Deeply stretches the hip flexors and quadriceps.
Ardha Hanumānāsana
The Half Splits are the most essential preparatory pose in the practice for the full splits. The key to the practice is to keep the hips neutral and the spine long, imagining your heart is extending towards the toes of your front foot.
Benefits
Precisely and deeply stretches the entire hamstring of the front leg.
Enhances body awareness and teaches how to maintain pelvic stability during a stretch.
This pose adds a gentle twist and stretch to the low lunge, targeting the quadriceps on the front of the back leg and the deep hip flexors. The flexibility of these two areas is the key to whether the front splits can be completed comfortably.
Benefits
Stretches the quadriceps of the back leg, which is one of the tightest areas for many people.
Further opens the hip flexors to create more space in the hip joint.
Gently twists the spine, increasing the body's range of motion and releasing stress.
Enjoy Your Practice Journey
I hope you liked this sharing. Set aside one day a week for deep stretching, allowing your body and mind to open up gradually. Quietly feel your breath, be grateful for your body, and take good care of yourself.
As always, sending you peace and joy.
💌 Subscribe to CloudC Yoga’s Newsletter & YouTube Channel
If you enjoy the yoga and meditation content we share, you may also like receiving my newsletter and YouTube tutorials:
➡️ Become a free member for CloudC Yoga Newsletter and receive monthly yoga and meditation practice.
➡️ Subscribe to our YouTube channel for weekly updates on meditation and yoga tutorials.
5 Hidden Body Stress Signs & How to Release Them (Body Scan Guide)
Feeling tired, irritable, or always unwell? Your body might be sending stress signals you're overlooking. Learn to identify 5 hidden body stress signs and discover soothing body scan, yoga, and meditation practices to release anxiety and restore your vitality.
Have you ever found yourself constantly tired, easily irritable, or always feeling unwell? Your body might not be sick, but you can't explain why you're so exhausted.
Physical and mental health are always intertwined. When psychological stress accumulates to a certain extent, a considerable amount of stress is already quietly hidden in the body.
The body constantly sends us signals. Learn to "read" your stress signs to readjust the pace of life and work. Coupled with soothing and straightforward body scan, yoga, and meditation practices, you can quickly restore your body to a balanced and healthy state.
Today, I'll share the five most common but easily overlooked stress signs I often receive from students and clients during my yoga and meditation teaching. Let's find them and practice body scans, yoga, and meditation together to find your energetic, vibrant self again.
Stress Sign 1 - Clenching Teeth and Grinding Teeth at Night
Many people unconsciously clench their teeth when nervous, and I have students who have unconsciously ground their teeth at night while sleeping. Through practice, they discovered that their "stress reaction point" was in their teeth.
If you find yourself often unconsciously clenching your teeth, or the frequency of grinding your teeth at night increases, the first thing you can do is to start with a 20 to 30-minute body scan to release the accumulated stress in your body.
In addition, before bed, try simple yoga stretches, breathing exercises, or pre-sleep meditation, which can help you relax your nervous system and fall asleep faster.
Fall Asleep in 10 Minutes With This Magical Cabin Meditation.
Stress Sign 2 - Shrugged Shoulders, Constant Headache, Shoulder and Neck Pain
Have you ever noticed that your shoulders are often shrugged? And your shoulders and neck easily feel tight, or do you often experience shoulder, neck, and headaches?
Many people unconsciously shrug their shoulders when working or feeling nervous. Shrugged shoulders also mean the body enters a "ready for battle" state.
A student once told me that she had never noticed that her shoulders were always shrugged until she did a body scan for the first time, and she was surprised that her shoulders didn't know how to relax.
Our shoulders are the "first line of defence" against stress. They will shrug up when you are focused, nervous, or in a hurry, as if ready to deal with a crisis at any time. But if this "ready for battle" state is turned on all day, over time, it will become the root cause of stiffness, soreness, and migraines.
If you are going through stress with tight shoulders and neck, try 15-minute daily stretches targeting the areas. I have seen many successful cases that eventually farewell their shoulder and neck pain with regular daily stretching.
Try this easy stretches to relax your neck and shoulders.
Stress Sign 3: Shallow Breathing and Frequent Shortness of Breath
What challenges new students the most is always starting the session with breathing exercises. I always start my classes with breathing awareness practice, and most new students find it hard to breathe "properly" and "freely".
When under stress, the body tends to hold up the breath, which makes us feel like we have a stuffy chest or shortness of breath. This is a sign that the body is in a state of "gasping for breath."
Practising conscious breathing is the first step to reconnecting mind-body awareness without forcing yourself to breathe deeply. Return to your body and observe the flow of your breath. When your breathing slows down, your heart will also gradually calm down, and so will your mind.
Take a moment to find inner peace with this 10 minute guided meditation.
Stress Sign 4: Lower Back Pain - Discomfort while Sitting or Standing
Do you feel like your lower back has been aching even though you haven't done much today? The lower back is one of the places where stress is most likely to "hide," especially for those who need to sit or stand for long periods.
Mental tension and lack of physical exercise can build stress in the lower back. When lower back soreness appears, perhaps your body is whispering to you: "I've been carrying this for a long time. Can I take a break for a while?"
When your lower back is tired, doing simple stretches can help relieve lower back soreness and muscle tension and strengthen your back muscles. Lower back relief exercises can help your body feel more comfortable, release stress, and welcome peace and healing.
Stress Sign 5 - Clenched Hands
Our hands are where we "grasp control" and where anxiety is most likely to manifest.
Have you ever noticed that you often clench your fists? Or are your fingers constantly moving unconsciously? Your body is trying to release inner anxiety through these movements.
Try body scanning to learn to relax in the most subtle parts of your body, such as your knuckles and fingertips. With a bit of practice every day, making releasing stress through fingertips a second nature, you will be surprised how powerful it is to learn to relax the subtle areas of your body.
Healing Begins With Noticing Your Stress Signals
If you recognize any signs above, congratulations! You are at your first step of healing, and a better you is undoubtedly on the way.
Now that you know you are working hard for your passion and life, you should also find time to reset.
Start with body scan meditation daily to soothe your mind and body. Every time you work hard, reward yourself with relaxation practice and allow yourself to return refreshed and energized.
Today, I invite you to practice this Body Scan meditation together. With awareness, from head to toe, connecting with every part of your body without forcing anything, surrender to the present moment.
I believe your body will love this healing gift. Leave a comment or email me to share your yoga journey.
Healing Begins With Noticing Your Stress Signals - Try Body Scan Meditation Now.
💌 Subscribe to Cloud's Joyful Newsletter & YouTube Channel
If you enjoy the yoga and meditation content I share, you may also like receiving my newsletter and YouTube tutorials:
➡️ Join Cloud's Joyful Newsletter and receive monthly yoga practices and spiritual reminders.
➡️ Subscribe to my YouTube channel for weekly updates on meditation and yoga tutorials.
Relieve Headaches and Shoulder Tension: 3 Simple Yoga Moves for Daily Relief
Feeling tightness in your neck and shoulders or dealing with stress-induced headaches? This gentle yoga sequence offers three simple yet effective moves to release tension, improve posture, and restore comfort—all in just a few minutes a day. No yoga mat needed!
Find Relief from Headaches and Shoulder Tightness—No Mat Needed
Do you often have a headache at certain times during the day? Or feel your neck and shoulders tense after long hours on the computer or phone? Today, I'd like to share a simple yoga routine to help relax your neck and shoulders, open up your body, and ease the headaches and tension caused by everyday stress.
Common Causes of Neck and Shoulder Pain
You may have experienced headaches or shoulder tightness like many of my students. This is often related to our daily habits—long hours spent on our phones, sitting at the computer, repetitive movements, and poor posture. Over time, these habits lead to muscle imbalance, causing headaches or even numbness in the hands.
Most people turn to painkillers, but addressing the root cause with relaxation and stretching may offer more lasting relief.
3 Steps to Relieve Neck and Shoulder Pain: Simple Yoga Poses Explained
This is a mat-free yoga practice that you can do on your bed or chair, with no special equipment needed. If your shoulders are particularly tight, you can use a yoga strap, towel, or clothing to assist with the arm bind in the Eagle Arm Pose. Find a quiet, comfortable space, and prepare to begin practising and easing the tension in your neck and shoulders.
Step 1: Side Neck Stretch (Parsva Śīrṣāsana)
Steps:
Sit comfortably with a relaxed posture. Gently place your right hand on your left ear.
As you exhale, slowly tilt your head to the right, bringing your right ear towards your right shoulder while letting your left shoulder drop.
Adjust the angle slightly: lower your chin or turn your head to feel the stretch along the left side of your neck.
After holding for a moment, switch sides.
Benefits:
Relieves neck tightness caused by long hours on your phone or computer
Eases tension headaches caused by poor posture
Helps relax the muscles around your neck and shoulders, reducing stress
Step 2: Eagle Arms (Garudasana Arms)
Steps:
Raise and flex both arms to 90 degrees, crossing your elbows (with the right elbow on top, or wrap your wrists together).
Let your shoulders sink, avoiding any shrugging.
Switch sides after completing the stretch.
Benefits:
Deeply open the muscles around your scapula and the inner shoulder
Effectively stretches areas that become stiff from long hours using a mouse or typing
Increases flexibility and circulation in the arms, shoulders, and neck
Step 3: Cow Face Pose (Gomukhasana)
Steps:
Raise your right arm from behind and your left arm from above your head, bringing your hands together (if you can't clasp your hands, use a yoga belt or towel to connect your hands).
For an advanced variation, gently lean to the left side to open up the space on the right side of your ribs.
Benefits:
Increases shoulder mobility and reduces stiffness and soreness
Helps relax the upper back and the area where the neck and back connect
Opens up the chest and armpits, promoting deep breathing and circulation
Bonus: Arm Circles
Steps:
Interlace your fingers, push your hands forward, and draw big circles backwards.
Repeat several times, opening up your entire upper body.
Tips: Everyone has different ranges of motion, so it's important to focus on how your body feels.
Benefits:
Stretches the entire shoulder girdle and back muscles, promoting blood flow and clearing blockages
Relieves upper back pressure, improving minor numbness caused by tightness
Enhances overall shoulder and neck flexibility and stability
When Your Body Is Relaxed, Your Mind Follows
This simple yoga routine can effectively ease neck and shoulder tension and reduce headaches. By practicing regularly, you'll notice your body becoming more open, with fewer aches and pains in your neck and shoulders, and your mood will improve as well.
You may experience some temporary tightness after practicing, but a warm bath or a few moments of relaxation will lead to noticeable improvements.
Set aside 5 to 10 minutes each day to quietly focus on your breath, appreciating your body, and showing yourself some love and care.
If you enjoyed this practice, feel free to share it with friends who may benefit—let's spread health and peace together.
💌 Subscribe to Cloud's Joyful Newsletter & YouTube Channel
If you enjoy the yoga and meditation content I share, you may also like receiving my newsletter and YouTube tutorials:
➡️ Join Cloud's Joyful Newsletter and receive monthly yoga practices and spiritual reminders.
➡️ Subscribe to my YouTube channel for weekly updates on meditation and yoga tutorials.
Benefits and Four Tips to Master One-Legged King Pigeon Pose (Eka Pada Rajakapotasana)
The King Pigeon Pose, or the Royal Pigeon Pose (Eka Pada Rajakapotasana), is an energizing pose that stretches the shoulders and vertebral column deeply. It also helps regulate the hormonal secretions, particularly those from the thyroid.
Master King Pigeon Pose (Eka Pada Rajakapotasana)
The King Pigeon Pose, or the Royal Pigeon Pose (Eka Pada Rajakapotasana), is an intermediate to advanced level yoga backbend pose. In this pose, the chest is fully opened like a pigeon. Eka means one, Pada is leg or foot, and Kapota is a pigeon. Rajakapota means the king of pigeons. Hence the name of the pose.
The Benefits of One-Legged King Pigeon Pose (Eka Pada Rajakapotasana) and Backbend
Practising backward bends brings great steadiness to the body, giving an excellent backward opening to the spine and strengthening the back muscles. Backwards Bends cure pain and discomfort due to poor postures, including hunchback, round shoulders, Teck Neck (also known as “text neck” or “screen neck”), back pain etc.
King Pigeon includes all the benefits of the backbend and also includes the following,
The posture stretches the shoulders deeply, allowing the joints to explore mobility, including the shoulder joints, elbow, wrist and small joints at the fingers.
Stretches the vertebral column and the muscles along the spine.
The posture stimulates hormonal secretions of the body, particularly those from the thyroid.
The hip muscles are stretched with an external hip opener in the front leg.
Overall, the One-Legged King Pigeon is an incredible pose that opens the body deeply from head to toe. The opening effect on a backward bend and hip opening is beneficial to regulate modern-day poor postures.
Backwards Bends cure pain and discomfort due to poor postures, including hunchback, round shoulders, Teck Neck (also known as “text neck” or “screen neck”), back pain etc.
The Preparation and Counter Pose of One-Legged King Pigeon (Eka Pada Rajakapotasana)
One-Legged King Pigeon is a deep backward bend, and advanced yogis can go deep into the pose. Before attempting the pose, make sure you properly warm up your body and joints. Prepare your body for sufficient shoulder-opening sequence and spinal mobility movement. >> Practice On YouTube: 30 mins Shoulders and Spinal Mobility
Counter Pose: Seated Forward Bend (Paschimottanasana)
Come out from the pose slowly with steady breathing. After the pose, counter the practice with gentle twisting or forward bend. The counter poses include the following,
Head-To-Knee Pose (Janu Sirsasana)
Seated Forward Bend (Paschimottanasana) - Click HERE to Practice on YouTube
FOUR Tips To Master One-Legged King Pigeon (Eka Pada Rajakapotasana)
Always keep in mind that practising yoga is not just about physical performance but also about the linkage between the mind and soul. Connecting with your mind and breath is vital when practising advanced yoga posture.
You must train your mind to concentrate and be conscious with every breath. These are the foundations for safe and effective practice.
Be Patient. Rotate your shoulder properly to grip.
Listen to your body. Align your spine to open your chest.
Centre your mind. Find your perfect balance.
Connect with your soul. Breathe and explore.
Keep up the practice, and let me know how it goes. Email me at info@cloudcyoga.com. I am always excited to read your emails.