
Your Custom Text Here

Four Yoga Stretches for Back Pain (Beginner Friendly)
Back pain is closely linked to lifestyle choices and emotional well-being. Yoga and meditation can help relieve discomfort and release mental stress.
Some gentle yoga stretches can be helpful for beginners. Here to highlight the FOUR of them,
Cat Cow Pose (Sanskrit: Viralasana)
Thread The Needles (Sanskrit: Supta Kapotasanaa)
Supine Spinal Twist (Sanskrit: Supta Matsyendrasana)
Knees to Chest Stretch (Sanskrit: Apanasana)
Back pain is our body signalling us to do something to heal.
Many people experience tension in the upper, middle, and lower back. As we age, our bodies accumulate many experiences and stress, which can lead to discomfort over time. Additionally, mental stress can pose emotional challenges when there's no way to release it.
Over the years, many of us have developed challenging relationships with our bodies and minds. I often hear my students say, "My body hates me," or "I can't live with my body anymore." The thing is, what our body wants is completely the opposite - our body loves us so much that it constantly sends messages to remind us to fix it.
The turning point towards a healthier body is to look at the body's "signals" from a different perspective. Since birth, our bodies have been tirelessly working for us, keeping us alive and supporting us in achieving our life goals. It makes sense that sometimes there are some glitches, but it is more of our body telling us, "Hey, something is not working well! Let's check and fix it." Learn to digest the message from a different perspective. Then you will see there's no such thing as a "hostile relationship" between us and our bodies.
The Link Between Back Pain, Lifestyle and Emotional Wellness
Back pain is closely linked to our lifestyle choices and emotional well-being. In urban environments, back pain is quite common. If you were to survey ten people, you would likely find that more than half experience tightness or pain in their lower back.
Practising yoga with moderate stretching can help relieve discomfort, but understanding the underlying causes can inspire us to take better care of our bodies. Let's look at it from the perspectives of The Body and The Mind.
The Body: Poor Posture is a direct cause of back pain.
Whether you work in an office or another setting, it's common to maintain the same posture for long hours. Our bodies are designed for movement, and staying still for too long can lead to various issues.
The good news is that the solution is quite simple. Dedicating just 10 to 15 minutes each day to practice yoga is a quick fix to alleviate the physical tension that builds up throughout the day.
I often suggest Morning Yoga because it helps to get the body's circulation going first thing in the morning. Opening your body in the morning makes your body and mind more relaxed.
The Mind: Stress-Induced Tension in the Physical Body
Mind and body are forever connected. It is impossible to have a healthy body when our stress level is rocket high. We need to manage stress healthily and keep our emotions calm and peaceful.

Often, we simplify emotions into just two categories: happy and unhappy. However, our emotional landscape is much more complex. In "Think and Grow Rich," Napoleon Hill identifies seven distinct types of negative emotions, illustrating the depth of our emotional experiences.
Jealousy
Hatred
Revenge
Greed
Superstition
Anger
Now we know emotions have a wide range of colours, so next time when you are "unhappy", instead of complaining, start by self-reflecting. For example, if you notice that someone’s social media updates tend to upset you, rather than reacting impulsively, take a moment to ask yourself, "What's behind these feelings?" Through this reflection, you may discover that your discomfort stems from your feelings of "jealousy, resentment, or frustration" and the fact that what another person has said or done probably has nothing to do with it.
When you keep yourself in check and start to notice your emotional patterns, you will make wiser choices about your reactions. Eventually, let go of the emotional pattern that no longer serves you to become a calmer version of yourself. Regular Yoga and Meditation practice is the key to guiding you back from the noisy world out there. Concentrate on improving yourself, enhancing your well-being, and overall becoming calmer and more at peace with yourself and the world around you.
15 Min Gentle Yoga for Upper and Lower Back |with Guided Meditation
This 15-minute morning yoga sequence consisted of four main yoga postures for beginner to intermediate level. I designed this sequence using a guided meditative approach so you can stretch your mental space and ease your mind at the same time.
If you feel intense pressure or discomfort, I advise you to seek professional guidance. Alternatively, you can join my 4-Week Foundation Yoga Course , which is a LIVE interactive online class to help to build a solid foundation for your yoga practice.
Level: Beginner
Sessions per week: Practice daily
Time of day: Best to practice in the afternoon or evening.
Types of exercises: Beginner Yoga, Gentle Stretch, Yoga for Back Pain, Yoga for Lower Back Pain
Tools needed: Yoga Block x 1
Note that your safety is our priority. If you have a long-term illness, stress, or uncertain conditions, please consult a doctor or professional before attempting any practices.
Sequence Details: Four Yoga Poses to Relieve Back Pain for Beginners
Let’s break down the Four Key Yoga Poses from this sequence. For details, please practice along with the YouTube Video, or join my in-person or online class to learn more tailored adjustments for your unique needs.
Pose 1: Cat Cow Pose (Sanskrit: Viralasana)
Cat Cow (Viralasana) is a typical pose for most practice. It’s a foundational yet powerful yoga pose for spinal health. The movement in the pose opens the space between each vertebral joint, promoting greater spine mobility from the neck to the lower back. The movement also stretches the muscles around the spine. Synchronise the movement with the rhythm of the breath to promote deeper concentration and relaxation of the mind and body.

Pose 1: Cat Cow Pose (Sanskrit: Viralasana)

Pose 1: Cat Cow Pose (Sanskrit: Viralasana)
Pose 2: Thread The Needles (Sanskrit: Supta Kapotasanaa)

Pose 2: Thread The Needles (Sanskrit: Supta Kapotasanaa)
Starting from the Table Top Position,
To start from the right side, extend the arms towards the ceiling, then “thread” the right arm to the left side.
Land your right ear on the floor, finding the balance of the pose.
If you feel stable with the pose, extend the upon arm on top of your head. Fingertips touching the floor.
Stay in the pose for five to six breaths, then switch sides.
Pose 3: Supine Spinal Twist (Sanskrit: Supta Matsyendrasana)
From lying down, hug both knees to chest.
Drop both legs to the left side and feel the gentle release from the waist.
To progress further, turn the head to the right side.
Stay in the pose for 2-3 minutes with gentle, steady breathing.
Switch sides and stay for an equal amount of time.

Pose 3: Supine Spinal Twist (Sanskrit: Supta Matsyendrasana)

Pose 3: Supine Spinal Twist (Sanskrit: Supta Matsyendrasana)
Pose 4: Knees to Chest Stretch (Sanskrit: Apanasana)

Pose 4: Knees to Chest Stretch (Sanskrit: Apanasana)
Apanasana is a great pose that gently stretches the upper, middle, and lower back.
This pose is simple and safe. For a quick stretch, you can also do it in your bed. Just make sure your mattress is not too soft and sinks your body, which can level out the stretching effect.
The best thing about this pose is that it is easy to perform and requires no tools. However, for those who experience tension around the neck, you may support your head with a yoga block or a pillow (if you are practising in bed).
Stay in this pose for about 2 minutes, close your eyes, breathe, and allow your mind and body to just relax.
Conclusion
Back pain is closely linked to lifestyle choices and emotional well-being. Yoga and meditation can help relieve discomfort and release mental stress.
Some gentle yoga stretches can be helpful for beginners. Here to highlight the FOUR of them,
Cat Cow Pose (Sanskrit: Viralasana)
Thread The Needles (Sanskrit: Supta Kapotasanaa)
Supine Spinal Twist (Sanskrit: Supta Matsyendrasana)
Knees to Chest Stretch (Sanskrit: Apanasana)
Let's continue the yoga journey together,
Practice on CloudC Yoga YouTube, or
Join Free Online Membership for the latest free yoga teachings.
Join my Online Yoga Class for more personalised practice.


Morning Yoga Can Be A Game Changer in Life.
As Ayurveda says, "How you start your day is how you are going to feel for the rest of the day." Even if you are not a fanatic of Ayurveda or Yoga, this statement is hard to disagree with. Starting the day with a yoga routine infuses us with the fountain of energy to lift the day and prepare us with the firm mindset to deal with whatever is going to happen on the way. With thousands of hours of teaching yoga under my belt, the best advice I have ever given to my students and clients is that you will never regret building a habit of starting your day with morning yoga. It is truly a Game Changer.
As Ayurveda says, "How you start your day is how you are going to feel for the rest of the day." Even if you are not a fanatic of Ayurveda or Yoga, this statement is hard to disagree with. Starting the day with a yoga routine infuses us with the fountain of energy to lift the day and prepare us with the firm mindset to deal with whatever is going to happen on the way. With thousands of hours of teaching yoga under my belt, the best advice I have ever given to my students and clients is that you will never regret building a habit of starting your day with morning yoga. It is truly a Game Changer.
Most of my students and clients are at the height of their careers, and fitting a yoga session into their busy days seems out of reach. Some may opt for a night class after long hours of day work, but it is only sometimes the best option since the physical and mental body are already very drained - the body is under low battery mode. We all know that health is wealth, and honouring our body with a well-balanced lifestyle is essential to keep us going. This dilemma of working hard for a career and working out for the body has the urgency to be resolved.
To work around this phenomenon, I suggest that my students prioritise yoga practice in the morning, which, for most of them, results in tremendous benefits for their well-being and other positive impacts revolving around their lives. Rather than saying "Benefits of Morning Yoga", I am more prone to describe it as the "Positive Side-Effect of Morning Yoga".
Some say life is an adventure, and some say it is a game, what do you think? Life is so interesting that one decision can lead you to the adventurous unknown. Imagine today, we all decide to do one thing right for our life every day; in 365 days, everything seems to be getting right altogether, not just for ourselves but also for the people and the community around us.
“Imagine today, we all decide to do one thing right for our life every day; in 365 days, everything seems to be getting right altogether, not just for ourselves but also for the people and the community around us.”
How does morning yoga work, and what are the positive side effects?

1. Lifestyle Change: Start small and make it your habit.
Most of the time, people overestimate the effort required to start practising yoga and think that a practice is only a practice when it takes at least 30 minutes or more.
I encourage my students to begin by dedicating just one day a week to practice, starting with a brief 15-minute session. Once you get used to practising for 15 minutes once a week, you can gradually increase the frequency to more days or extend the duration of your practice sessions. Take small steps and incorporate morning yoga into your daily routine. Just as we need to brush our teeth daily, we should also arrange a time to nurture the mind and body through yoga.
Looking back, when I first introduced morning yoga to my students as self-practice and morning sessions at the yoga studio, it was not a popular option. As time passed, the benefits of morning yoga stood the test of time. More and more students joined the tribe because they all realised how powerful it was for them to start their day energised with yoga practice. If countless others are already taking steps to improve themselves each day, what's stopping you from doing the same?
2. Mindset Shift: Let peace be the tone of your day.
The primary focus of morning yoga practice is connecting our body and mind with deep breathing to balance our nervous system. Conscious breathing helps balance our sympathetic nervous system (SNS, fight or flight) and parasympathetic nervous system (PNS, rest and digest). We need to learn to respond to different situations wisely and avoid being overly stimulated by SNS, which can lead to overstress.
When we start the day in a rush and are overwhelmingly distracted by the outside world, our sympathetic system is actively stimulated, ready to protect and prepare us to fight or flight—even if we are not in acute danger.
Constant stress from the outside world can keep the fighting mode ON all the time, and morning yoga can help bring our system back to balance. In yoga practice, you return to the reservoir of your peaceful energy. Start with deep breathing awareness, scan your body, move, and let go of tension. Set your tone for the day at peace before reconnecting with the outside world. Deep breathing expands your lung capacity and, at the same time, soothes your nervous system. Even if the outside world is chaotic, a Peaceful state of mind guides you to respond calmly, bringing harmony to the workplace and the community. Be the first to make the change and spread Peace.
3. Physical Win: Better weight management with a healthy mindset
Regular yoga practice can help regulate your body weight, whether overweight or underweight, and it all starts with the right mindset towards your lifestyle. Before we validate this point, we should know that to attain an ideal healthy body weight is not merely about diet but a healthy mindset to see our life as a whole.
As mentioned earlier, morning yoga can help us set a peaceful tone for the day; with a peaceful worldview, we can make better life choices. For example, when we are not emotionally overwhelmed, emotional eating can be minimised, and eating disorders can be avoided.
Our body systems function better when we wake up regularly to work out.
The muscular system is trained with light body weight movement in yoga;
The nervous systems are calmer and at ease;
The cardiovascular system and respiratory systems benefit from deep breathing practices;
Digestive systems are aided with morning movement and function better;
The immune system is boosted when our stress hormones are at a healthy balance.
Ever since my students started to pick up morning yoga, most of them began to notice physical changes in one to three months, depending on their frequency of practice. It’s not just the change from the internal system but also reflected with more toned muscles, regulated body weight and shinning skin! Some of my students even look younger as they persist in morning yoga for over 6 months or more.
4. Willpower Up: Start your day with good energy instead of endless scrolling on your phone.
Getting out of bed right after waking up is a struggle, especially now we have that little digital device (our phone) to scroll with. Let's face it: how many days are you relying on "endless scrolling" to wake you up? Have you ever counted the minutes or hours you spent scrolling before "truly get out of bed"?
Trade that 15 minutes of scrolling for a quick morning yoga sequence can invite good blood flow for your whole body. Overcome the temptation to stay passively on content consumption or stay lazy in bed. Level up your willpower, get up immediately after the alarm and start practising yoga first thing in the morning.
A good yoga flow eases the stiffness stored over a long night's sleep. Kickstart your day with yoga mobility and strength practice, allowing blood to flow from head to toe, envigorating us from the inside out. Over time, build up the stamina of willpower to overcome other areas of life.
20-Min Morning Yoga - About This Yoga Sequence
This 20-minute morning yoga sequence mainly consisted of 9 yoga postures for beginner to intermediate level. The poses require more strength from the wrist. If you feel intense pressure or discomfort from the wrist, seek professional guidance. Alternatively, you can join my 4-Week Foundation Yoga Course - a solid foundation is the shortcut to success.
Level: Beginner to Intermediate
Sessions per week: 2-3 times per week
Time of day: Best in the morning or any other time.
Types of exercises: Beginner Yoga, Simple Stretching, Basic Strength
Tools needed: Optional to have one yoga block or thick book.
Note that your safety is our priority. If you have a long-term illness, stress, or uncertain conditions, please consult a doctor or professional before attempting any practices.
Sequence Details: Nine Poses to Practice for Morning Yoga
Let’s break down the Nine Key Yoga Poses from this sequence. For details, please practice along with the YouTube Video, or join my in-person or online class to learn more tailored adjustments for your unique needs.
Pose 1: Spinal Extension

Morning Yoga Pose One: Spinal Extension
Spinal Extension is a simple exercise. Inhale, extend the arms towards the ceiling and exhale arms down. Repeat for 5 to 10 rounds.
The benefit of spinal extension is to wake up our spine after long hours of sleep at night, opening the space between each vertebrae. Synchronizing the movement with the breath draws in fresh oxygen into our lungs, waking up every cell inside our body.
Pose 2: Forward and Backward Bend
Forward and Backward Bend is a deepening version of Spinal Extension. Inhale, arms up and open your chest; exhale, dive forward into a forward bend. Repeat for around 5-10 rounds.
The benefit of this pose is that it allows full front and back body stretching. The movement is accompanied by breath and proper alignments, giving the body an opportunity to kick-start mobility right in the morning.

Pose 3: Plank Pose (Sanskrit: Phalakasana)

Pose 3: Plank Pose (Sanskrit: Phalakasana)
The plank pose is no stranger to everyone and is one of the most essential poses in the Vinyasa Yoga Family.
It is an excellent pose for training and toning all body muscles. Whether held statically or as part of movement practice, plank challenges endurance and willpower.
It is also one of the best poses for body weight management. If your goal is to lose weight or increase muscle mass, it is a great pose you don’t want to miss from your routine.
Pose 4: Cat Cow (Viralasana) | Benefits for Spine and Shoulders
Cat Cow (Viralasana) is a typical pose for most practice. It’s a foundational yet powerful yoga pose for spinal health. The movement in the pose opens the space between each vertebral joint, promoting greater spine mobility from the neck to the lower back. The movement also stretches the muscles around the spine. Synchronise the movement with the rhythm of the breath to promote deeper concentration and relaxation of the mind and body.


Pose 5: Core Crunch

Pose 5: Core Crunch
This is a variation of Plank Pose with a stronger core-strengthening effect. Core-crunching pose is a combined movement that requires full-body strength, core engagement, and mobility. Regular practice of Core-Crunching Pose can tone the muscles and enhance full-body mobility.
Pose 6: Revolved Lunge Pose (Sanskrit: Parivrtta Anjaneyasana)
Lunging is the foundation of this pose. The twisting movement in this pose can stretch the back muscles and also press the abdomen region to massage the intestine. If you easily get constipated, adding twisting postures in the morning can benefit you, facilitating the body's detoxification process.


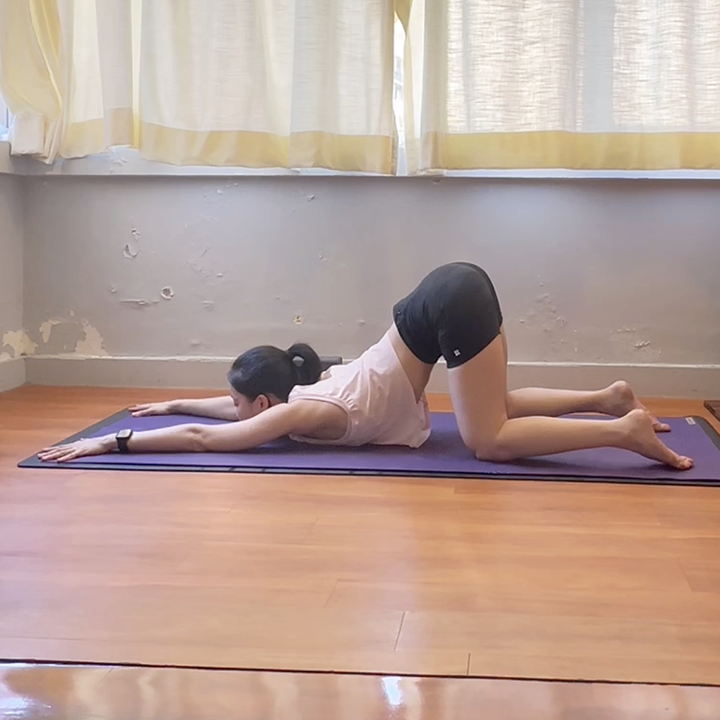
Pose 7: Puppy Pose (Sanskrit: Uttana Shishosana)

Pose 7: Puppy Pose (Sanskrit: Uttana Shishosana)
Puppy Pose helps to fully extend the spine and stretch the shoulders. Regular practice can help restore a healthy spinal curve and open the chest, countering the effects of hunching. It also stretches and opens the shoulders, which benefits those with tight shoulders.
Pose 8: Cobra Pose (Sanskrit: Bhujangasana)
The Cobra Pose is excellent for stretching the back muscles along the spine and allows good chest expansion to open the upper front body region. If you live a sedentary lifestyle and spend a lots of time on screen-based activities (i.e. working at the office, checking out cell phone), Cobra is a great pose to help combat daily bad postures. The benefits of cobra pose include the following,

Pose 8: Cobra Pose (Sanskrit: Bhujangasana)
Enhance full body flexibility.
Exercise and strengthen back muscles.
Stretches and expands the chest and ribs to enhance breathing capacity.
Gently press the abdomen to massage the internal organs.
It may help reduce and relieve menstrual discomfort.
Pose 9: Seated Forward Bend (Sanskrit: Paschimottanasana)

Pose 9: Seated Forward Bend (Sanskrit: Paschimottanasana)
Seated forward can stretch the entire body from the legs to the back. To learn more about the proper alignments of Seated Forward Bend, please refer to the article listed below.
Conclusion
Morning Yoga can be a game changer in one’s life, positively impacting our Lifestyle Change, Mindset Shift, Physical Win and Willpower Up. The 9 Key Yoga Poses for Morning Yoga include the following,
Spinal Extension
Forward and Backward Bend
Plank Pose (Sanskrit: Phalakasana)
Cat Cow (Viralasana)
Core Crunch
Revolved Lunge Pose (Sanskrit: Parivrtta Anjaneyasana)
Puppy Pose (Sanskrit: Uttana Shishosana)
Cobra Pose (Sanskrit: Bhujangasana)
Seated Forward Bend (Sanskrit: Paschimottanasana)
Practice with CloudC Yoga on YouTube, or join my Online Yoga Class for more personalised practice. See you soon!


FOUR Yoga Poses to Relieve Neck and Shoulder Pain
Tightness in the neck and shoulders can often result in pain in these areas. Managing neck and shoulder pain is simpler than it may seem. All it takes is 15-20 minutes of mindful stretching and breathing exercises each day. By peeling away the layers of tension in our muscles, we can return to a peaceful state. This straightforward routine can be easily incorporated into our daily lives, giving you the confidence to take control of your pain management.
Tightness in the neck and shoulders can often result in pain in these areas. For many people, lifestyle is the main contributing factor, such as working at a desk for long periods, engaging in laborious work over the long term, or maintaining unhealthy postures.
Another one is the psychological factor when one is often under stress, tension, anxiety and depression. These negative emotions are said to store tension around our neck and shoulders as well.
Managing neck and shoulder pain is simpler than it may seem. All it takes is 15-20 minutes of mindful stretching and breathing exercises each day. By peeling away the layers of tension in our muscles, we can return to a peaceful state. This straightforward routine can be easily incorporated into daily life.
About This Yoga Sequence
Level: Beginner to Intermediate
Sessions per week: 2-3 times per week
Time of day: Anytime during the day for relaxation, with the best times being in the afternoon or evening.
Types of exercises: Pain Management, Beginner Yoga, Simple Stretching
Tools needed: One yoga strap or towel, one yoga block or thick book.
Note that your safety is our priority. If you have a long-term illness, stress, or uncertain conditions, please consult a doctor or professional before attempting to any practices.
YouTube Practice on Neck and Shoulder Stretch
Four Yoga Poses for Neck and Shoulder Stretch to Relieve Pain
The following introduces the benefits of four yoga stretches, including Cat-Cow Pose, Cow Face Pose, Side Neck Stretch, and Puppy Pose. These poses can help relieve shoulder and neck pain caused by muscle tightness. Practice the pose on our YouTube video for neck and shoulder stretch.
Pose 1: Cat-Cow Pose (Viralasana) | Benefits for Spinal Health


Cat Cow (Viralasana) is a typical pose for most practice. It’s a foundational yet powerful yoga pose for spinal health. The movement in the pose opens the space between each vertebral joint, promoting greater mobility of the spine from the neck to the lower back. The movement also stretches the muscles around the spine. Synchronise the movement with the rhythm of the breath to promote deeper concentration and relaxation of the mind and body.
Pose 2: Cow Face Pose (Gomukhasana) | Benefits for Shoulders and Deltoid Muscles


This sequence focuses on the upper body. Cow Face Pose (Gomukhasana) is an excellent yoga pose for dynamically stretching the muscles around the shoulders, especially effective in releasing tension in the deltoid muscles. If you spend much time working at your desk, consider incorporating this beneficial pose into your daily routine.
Pose 3: Side Neck Stretch | Benefits for Neck


Our necks are designed to move in a wide range of motion, from front to back, left to right, and rotation. Side neck stretching is simple and does not have many alignment restrictions. Consider adding this pose to your office yoga routine.
Pose 4: Puppy Pose (Uttana Shishosana) | Benefits for Spine and Shoulders

Puppy Pose helps to fully extend the spine and stretch the shoulders. Regular practice can help restore a healthy spinal curve and open the chest, countering the effects of hunching. It also stretches and opens the shoulders, which benefits those with tight shoulders.
Conclusion
Incorporating a regular yoga practice into your routine can significantly help alleviate neck and shoulder pain caused by muscle tightness, stress, and poor posture. By dedicating just 15-20 minutes each day to mindful stretching and breathing exercises, you can gradually release tension and return to a state of peace and relaxation.
With dedication and consistency, you can take control of your pain management and work towards a healthier, more comfortable lifestyle. Keep up the practice.
Wheel Pose (Urdhva Dhanurasana): Restore spinal curve and help with Hunchback
Explore the benefits and techniques of Wheel Pose (Urdhva Dhanurasana) with our comprehensive guide. Learn proper alignment, safety precautions, and how to experience the incredible yoga pose.
Wheel Pose, also called Urdhva Dhanurasana in Sanskrit, is an excellent backbend that engages every muscle in the body. It opens the front of the body while strengthening the back body.
This article will cover this beautiful yoga pose's essential preparation steps, alignment, safety, and benefits.
Preparation: Get your body ready for Wheel Pose (Urdhva Dhanurasana)
Proper Warm-Up: Before attempting the Wheel Pose, warm up your body with full-body opening practice. It's always best to include several rounds of Sun Salutation and another warm-up sequence focusing on the spine, shoulders, and hips. Think of it as awakening your muscles and preparing them for this dynamic posture.
Building Strength and Flexibility: A strong foundation is critical. Strengthen your back, shoulders, and core with exercises like Cobra Pose (Bhujangasana), Plank Pose, and Bridge Pose (Setu Bandhasana). These poses will help you build the strength and flexibility you need for Wheel Pose.
Steps: Getting into Wheel Pose (Urdhva Dhanurasana)
Lift Your Hips: Press through your feet and lift your hips up to create an arch with your back.
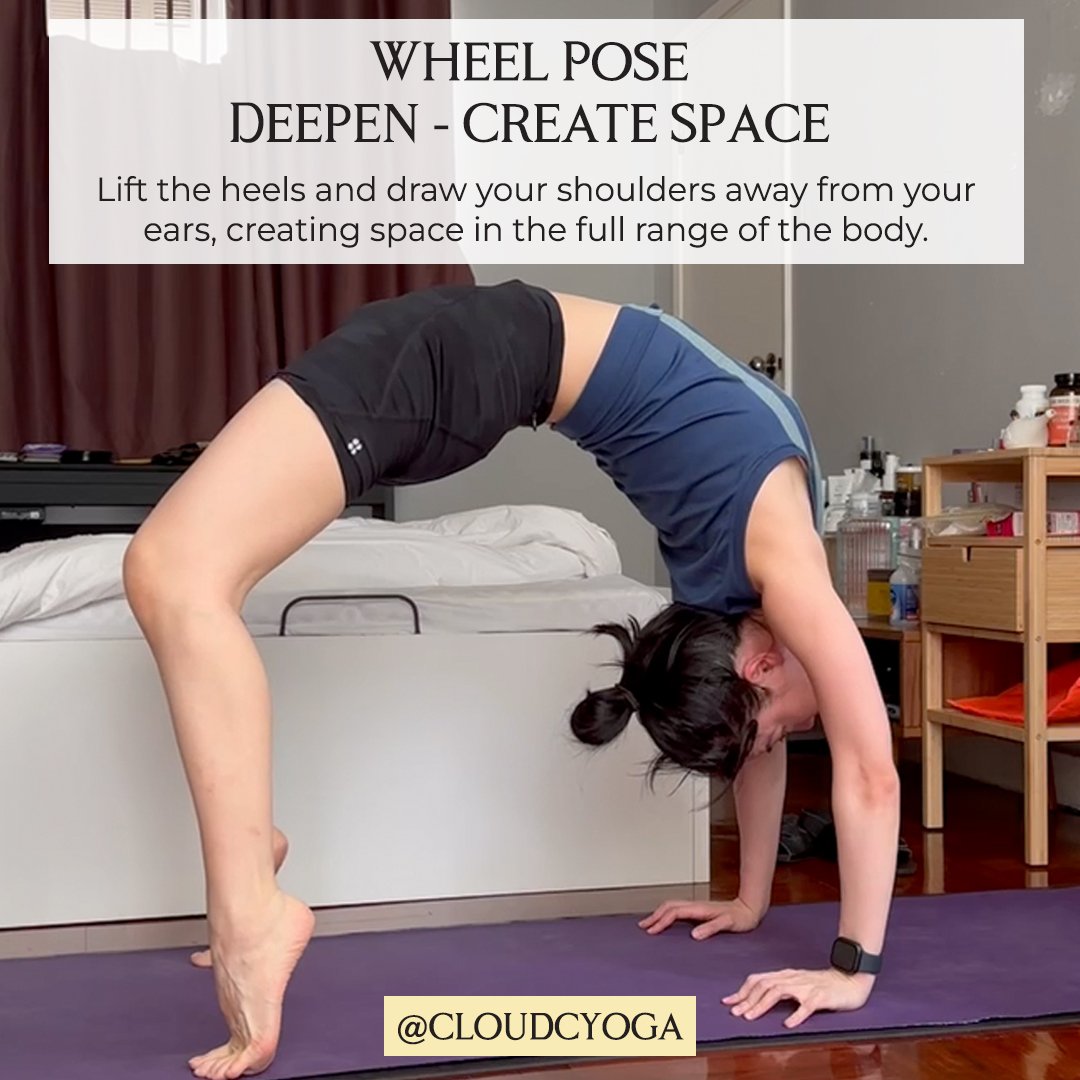
Deepen with Heels Up: Lift the heels and draw your shoulders away from your ears, creating space in the full range of your the body.
Start on Your Back: Lie on your back on the floor. Bend your knees and bring your heels to your buttocks, feet hip-width apart. Place your hands under your shoulders, palms down.
Lift Your Hips: Press through your feet and lift your hips up to create an arch with your back.
Half Wheel Pose: Rest the top of the head on the floor; for beginners, consider staying at the Half Wheel Pose as a light version of the Wheel Pose. (See Image or Click HERE)
Straighten Your Arms: Slowly straighten your arms, pushing through your palms to lift your chest up and open your chest.
Creating More Space: To deepen the pose, lift the heels and draw your shoulders away from your ears, creating space in the full range of the body. (See Imageor Click HERE)
General Alignments: Practice Wheel Pose Safely (Urdhva Dhanurasana)
Hands Position: Place your hands under your shoulders, fingers pointing towards your shoulders, and ensure your palms are flat and have a firm grip on the yoga mat.
Chest Opening: While holding the Pose, allow your chest to open and lift.
Spinal Curve: As you lift into Wheel Pose, allow your spine to gently open and explore your natural curve. Do not overly arch your back.
Strong Legs: Engage your quads, hamstrings and hips to support the Pose.
Neck Relaxed: Keep your neck long and relaxed.
Shoulder Space: Draw your shoulders away from your ears to prevent strain on your neck and shoulders.
Safety: Listen to your body
Do not force yourself, especially your lower back. It's common to feel pain and strain in Wheel Pose when the body is NOT open correctly or in proper alignment. Pay attention to the important message that your body is sending you.
Practice Patience: Building strength and flexibility in every yoga pose takes time, and the wheel pose is like no other. Take your time to understand the Pose and practice regularly to equip yourself with the strength and flexibility you need for this Pose.
General Benefits of Practising Wheel Pose
Release Shoulder Tightness and Hunchback: Wheel Pose focuses on opening the upper body and building strength for the entire spine. By alleviating tension in the back, it also provides an opportunity for individuals with hunchbacks to restore a healthy curvature of the spine.
Breathe Better: Regular backend practice, such as wheel pose, may improve shortness of breath as it opens more space in the upper body, especially the chest and ribcage.
Healthy Spinal Curve: Proper backbend practice, such as Wheel Pose, is beneficial for neutralising the spinal curve and restoring balance to a hunched spine, a common condition of modern sedentary lifestyles.
Enhance Strength: Wheel Pose strengthens the muscles in your back, shoulders, and legs.
Better Circulation and Energy: Yoga backbends, such as Wheel Pose, can boost blood flow to the brain, improving circulation.
Enhance Focus and Concentration: As you must be fully present when attempting this muscular Pose, your concentration level will be cultivated over time.

Headstand (Sirsasana): The Alignments and Benefits
Unlock the power of the Headstand (Sirsasana) with our detailed guide. Learn proper alignment and safety tips, and discover the benefits of this transformative yoga pose.
The headstand, or Sirsasana, is a powerful yoga pose with numerous bodily and mental benefits. It's known to strengthen your core, improve circulation, boost energy levels, calm the mind, and even enhance your sense of balance and focus. However, this inversion requires careful alignment and preparation to avoid injury.
This guide will help you understand the key elements of practising a safe and effective headstand.
Preparation, Before You Begin
With a mindful approach, we can create a safe and fulfilling headstand practice. Let's begin by preparing our bodies with a warm-up, strengthening our core, and always seeking guidance when needed.
Warm-Up: Always warm up your body before attempting a headstand. Do a full-body warm-up, focusing more on your neck, shoulders, and spine.
Build Strength: Strengthen your upper body and core with exercises like planks, push-ups, and shoulder stands. These will create a strong foundation for your practice.
Seek Guidance: If you're new to inversions or have any injuries, consult a qualified yoga teacher or healthcare professional before practising headstands. Their expertise will guide you safely on your journey.
Alignment, The Key to Safety and Grace
Alignment is a way of listening to and honoring our body's wisdom. By aligning our body in headstand, we create a safe and balanced experience that allows us to fully experience the benefits of this powerful inversion.

Head Placement:
Interlace your fingers, forming a triangle with your palms.
Place the top of your head on the floor, ensuring your elbows are shoulder-width apart. Forming a solid foundation
Arm and Shoulder Engagement:
Keep your arms firm and engaged, as if you're pushing the floor away with strength.
Your shoulders should be away from your ears, creating space and ease within your arm and shoulder areas.
Core:
Engage your core, and preventing any strain on the lower back.
Leg Placement:
Start with your legs bent, feeling the earth beneath your feet.
With gentle intention, lift one leg, then the other.
Keep your legs together, engage your thighs and quadriceps.
Gaze:
Rest your gaze slightly beyond, embracing a sense of calm and centeredness.
Safety, Honoring Your Body
Safety and mindfulness go hand in hand in our yoga journey. Let's approach headstand with care, honoring our bodies' needs and finding balance through gentle guidance and a supportive environment.
Wall Support: A wall can offer comforting support for those starting their journey. Use it to build confidence and find your balance.
Listen to Your Body's Wisdom: Gently release the pose if you feel any discomfort. Your body is always telling you something.
Embrace Gradual Progress: Let us begin with shorter holds, gradually increasing the duration as your strength and confidence grow. Be patient with yourself.
Breathe as Our Anchor: Breathe deeply and evenly throughout the pose. Each inhale and exhale anchors us to the present moment, allowing us to find peace and balance.
Benefits, The Power of Headstand
Headstand is a practice that unlocks a world of potential within us. Let's explore the incredible ways this powerful pose can enhance our strength, flexibility, and sense of well-being.
Increased Strength and Flexibility: Headstands challenge your core, arms, and shoulders, building strength and enhancing flexibility.
Improved Circulation and Energy: Inversions like headstands increase blood flow to the brain, improving circulation and boosting energy levels. Feel that energy flowing through you!
Calming the Mind: The headstand can help calm the nervous system and promote relaxation.
Enhanced Focus and Concentration: The increased blood flow to the brain can sharpen focus and improve concentration.
Remember that the headstand is a path to building strength, grace, and self-discovery. Approach each stage with patience, love, and a focus on safety. Namaste.

Downward Facing Dog: Essential Yoga Posture and Beginner Modifications for Maximum Benefits
Downward Facing Dog and 2 Variations for Beginners" is a helpful guide for those new to yoga. The article introduces the classic Downward Facing Dog pose and provides two variations tailored specifically for beginners. Whether you're looking to improve flexibility, build strength, or simply relax, this guide offers a great starting point for your yoga journey.
Downward Facing Dog: Essential Yoga Posture
The yoga posture known as Downward Facing Dog (Adho Mukha Svanasana) is familiar to all. Whether or not you engage in yoga, you have likely come across this pose at some point.
Now, let us examine it more closely and delve into the two modifications designed for beginners to enhance this essential yoga posture's mental and physical advantages.
Downward Facing Dog Version 1: The Original Version

To get into a downward-facing dog, starting from the tabletop pose is commonly recommended,
From the tabletop, lift the knees up off the floor.
Through that, extend to find the entire length of the spine. A downward-facing dog's most important aspect is finding the full release of the spine to get the most benefits.
Keep your head down, pointing downward.
The legs could be straightened or bent if the spine is adequately elongated without rounding.
For beginners, stay in the pose for 2-3 breaths and gradually build up to a longer duration.
The downward-facing dog can be modified for individuals with different ranges of motion, especially those with less mobility training. Below are the most recommended modifications for entry-level beginners or anyone who finds it hard to accommodate into the full version yet,
Option 2. Modification Bend Knees Version Downward Facing Dog

Based on the steps from the original version, slightly bend your knees towards your chest while maintaining the spine in proper alignment without rounding.
Stay in this pose for around 3-5 long deep breaths.
Option 3. Modification with movement - Paddling in Downward Dog
Based on option 1, paddling your feet in and out in the downward dog.
Start slightly bending your right knee towards your chest while straightening your left leg. Feel the left leg stretch from the calf muscles to the hamstring and hips. Repeat the same motions on the other side.
For active practice, keep your paddling lightly and smoothly; at any point, if you feel a deeper stretch and connection on one of the legs, you may stay there longer.


What are the benefits of a downward-facing dog?
The Light of Yoga by B.K.S. Iyengar emphasizes the numerous benefits of incorporating downward-facing dogs into one's yoga practice. Here's a concise summary in bullet points.
When one is exhausted, staying longer in this pose removes fatigue and brings back the lost energy.
The pose is perfect for runners who get tired after a hard race.
The pose relieves pain and stiffness in the heels and helps to soften calcaneal spurs. It strengthens the ankles and makes the legs shapely.
This asana helps eradicate stiffness in the region of the shoulder blades, thereby relieving arthritis of the shoulder joints.
The abdominal muscles are drawn towards the spine and strengthened. The heart rate is slowed as the diaphragm is lifted to the chest cavity.
Those afraid to do Siraasana (headstand) can conveniently practise this position. As the trunk is lowered in this asana, it is fully stretched, and healthy blood is brought to this region without any strain on the heart.

Learn the Modified Sun Salutation Sequence for Beginners
Sun Salutation is a must-learn sequence for beginners in yoga. However, it can be challenging for many students to master the sequence due to its complexity. As a yoga teacher, I have modified the sequence over the years to help my students gradually build the strength and mobility required for their long-term yoga journey. In this article, I will guide you through the modified version of the Sun Salutation sequence with step-by-step instructions, enabling you to lay a solid foundation for your future success. Remember to breathe deeply and move along with the rhythm of your breath to enjoy the beauty of Sun Salutation.
Sun Salutation is the must-to-learn when introducing yoga to beginners. Interestingly, throughout my years of teaching, the Sun Salutation sequence has been more challenging than it seems to most beginners.
Many of my students were frustrated when they first learned the Sun Salutation; hence, I modified it so they could eventually taste the sequence's beauty and build up the strength and mobility required for their long-term journey.
Sun Salutation varies slightly between different yoga styles and traditions, but whatever version you aim for, this modification will lay a solid foundation for your future success.
Step 1 - Mountain Pose - (Tadasana)
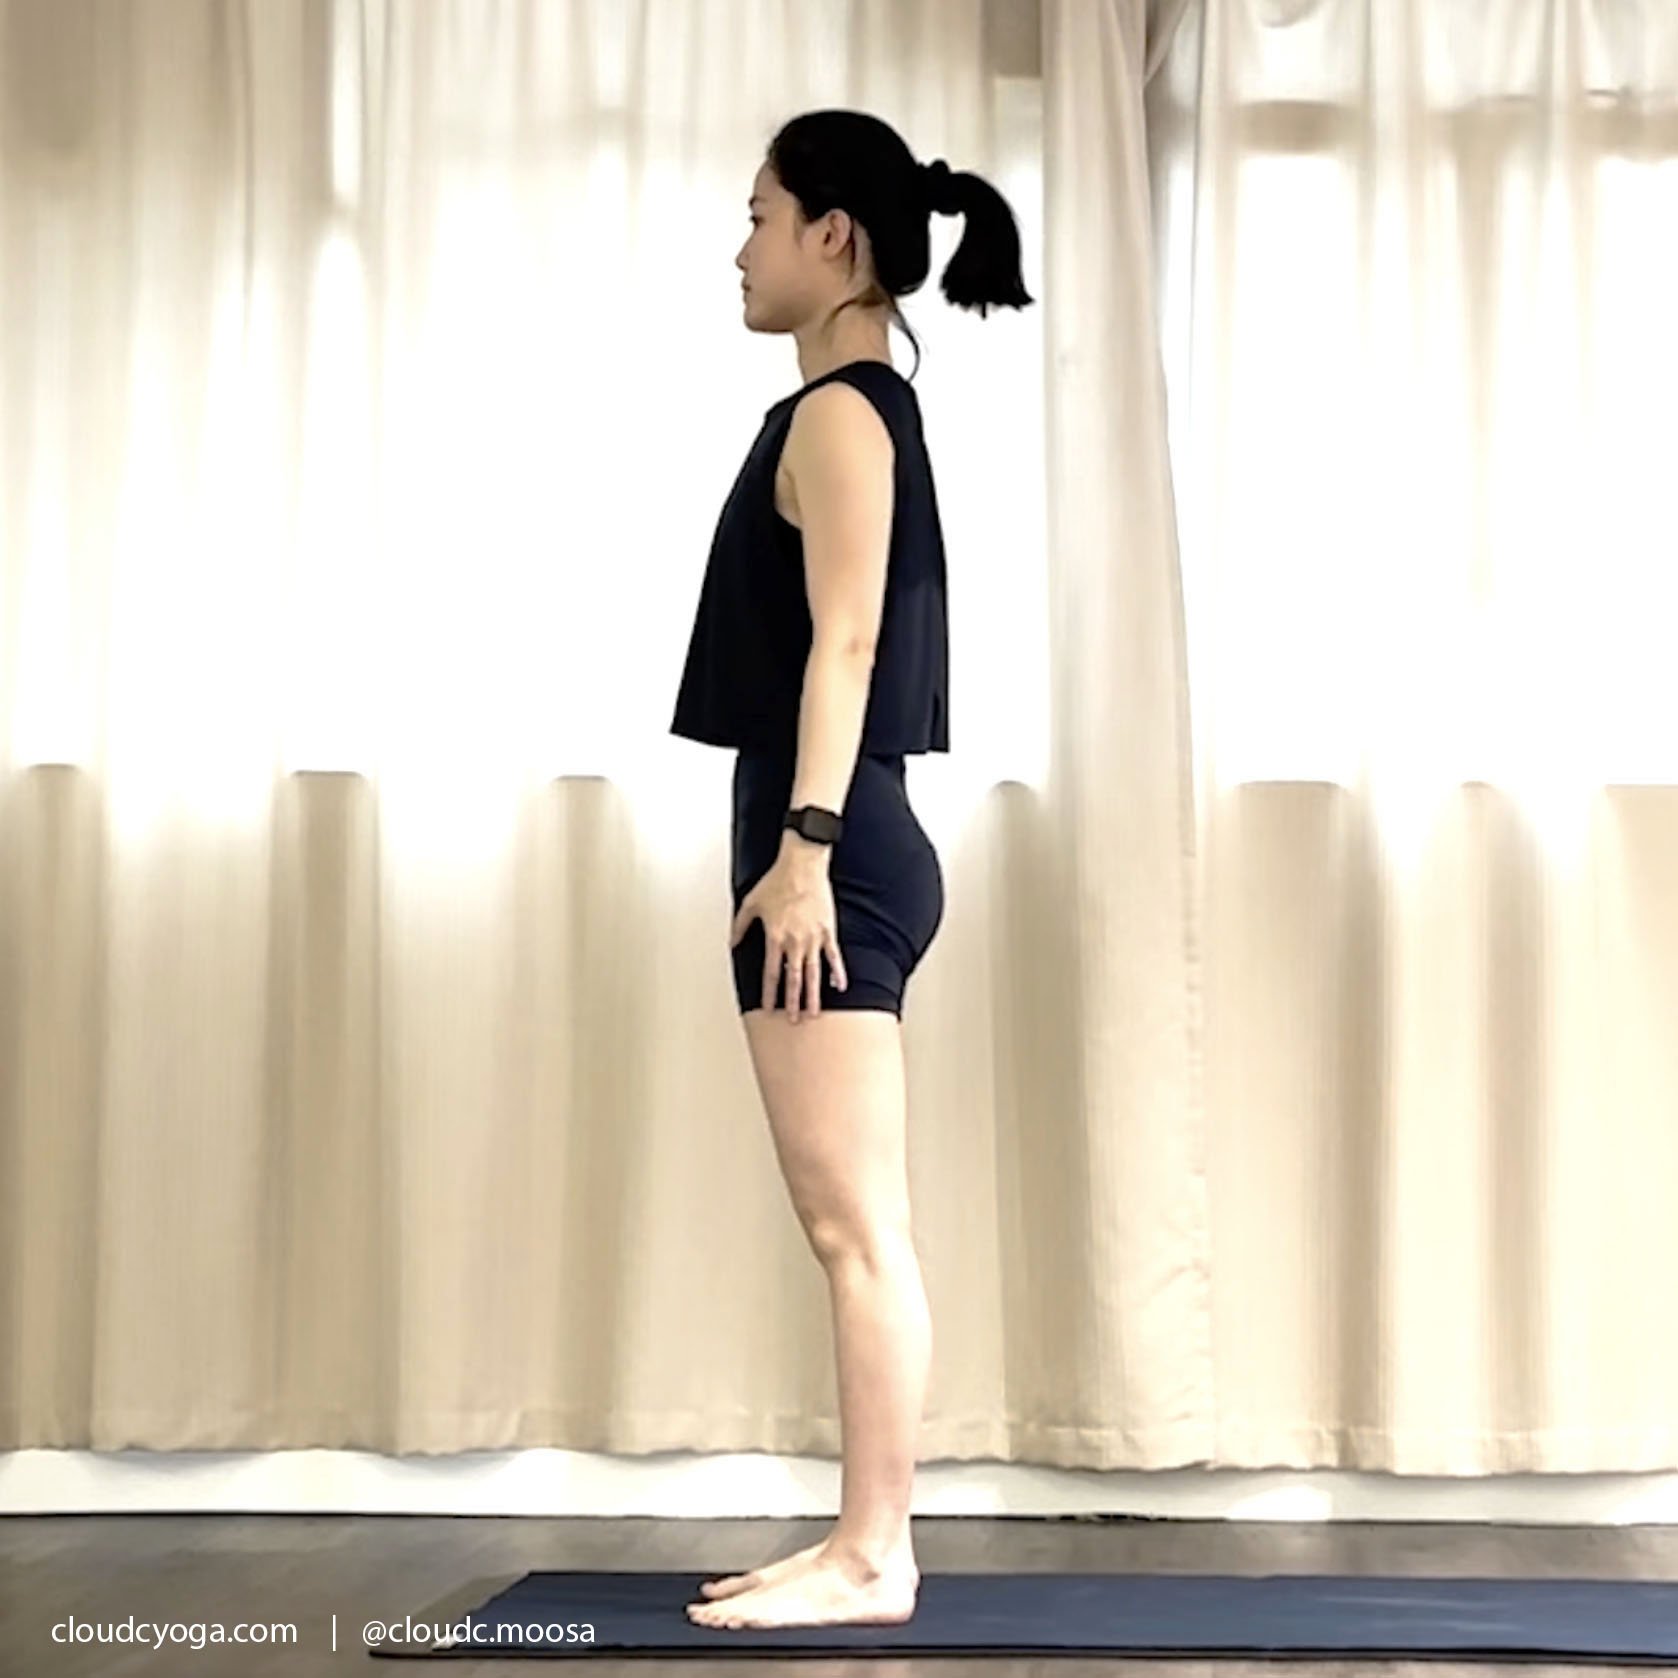
Start from standing in Tadasana and rebuild the intention of standing firmly grounded.
Keep your feet shoulder distance, and feel the power of grounding while standing.
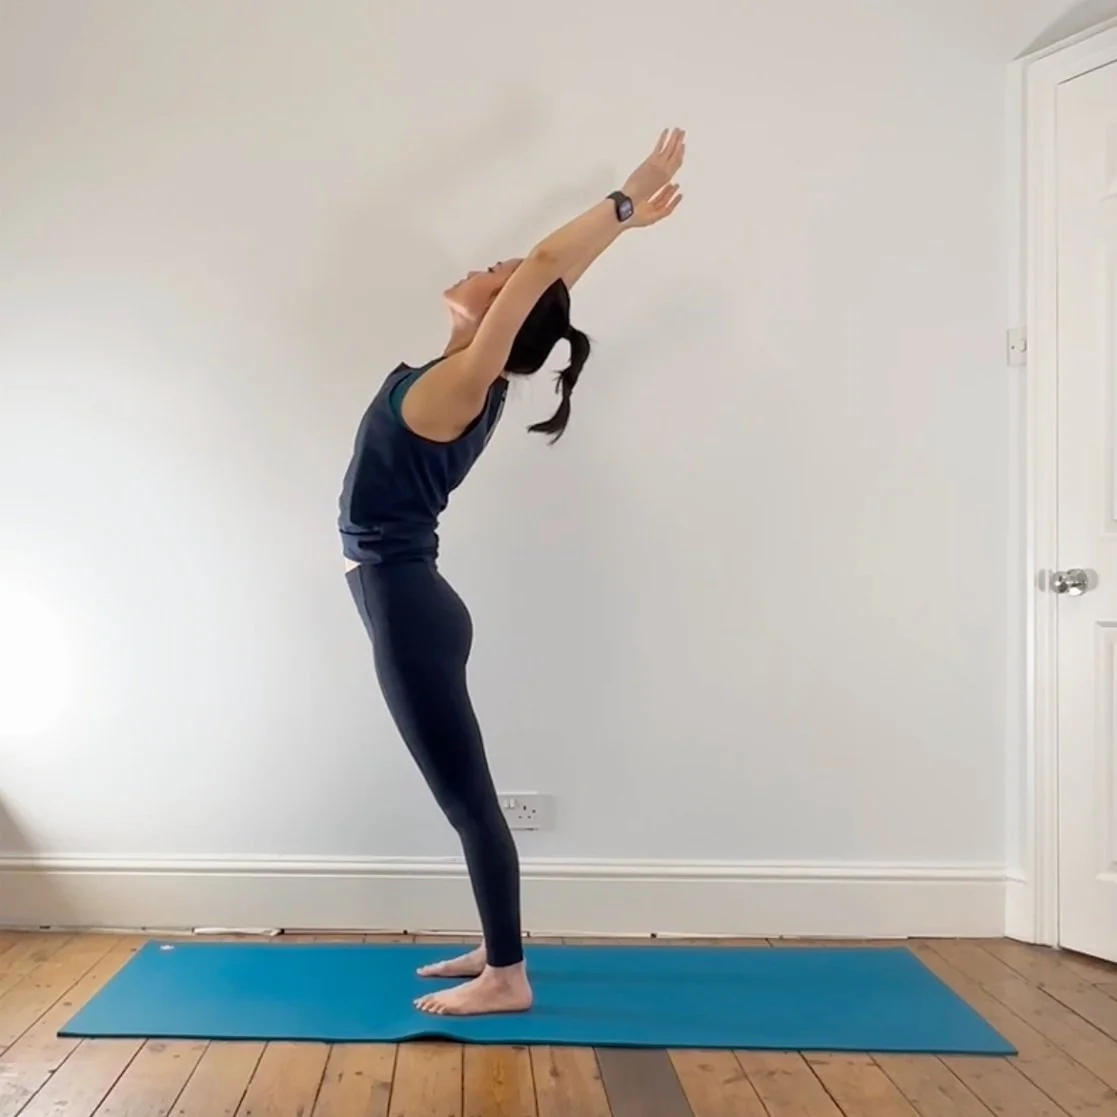
Step 2 - Arms Extended in Mountain Pose (Utthita Hastasana in Tadasana)

Arms Extended in Mountain Pose (Utthita Hastasana in Tadasana)
Raise your arms next to your ears.
Chest slightly lifted, gaze upward.
Enjoy deep breaths in this gentle front body opening.

Dive into a standing forward bend with your knees bent.
Grab your ankle with your hands.
Bring the belly close to the thighs as much as possible.
Elongate the spine.
Keep neck and head relaxed.
Step 4: Half Forward Bend (Ardha Uttanasana)

Half Forward Bend - Ardha Uttanasana
Lift head halfway.
Elongate the spine.
Keep knees slightly bent at a comfortable level.
Step 5: Low Lunge (Anjaneyasana)

Low Lunge (Anjaneyasana)
Step your right leg back, and bring your knee to the floor.
Arms reach up next to the ears.
Keep the foundation solid, and remain steady in the pose.
Step 6: Cat Cow (Marjaryasana)
On inhalation, drop the belly and head up.
On exhalation, round the back chin of the chest.
Exploring the space within your space.
Move along with the rhythm of your breath.

Cat Cow (Marjaryasana) - Cow Pose

Cat Cow (Marjaryasana) - Cat Pose
Step 7: Downward-Facing Dog - Adho Mukha Svanasana

Downward-Facing Dog - Adho Mukha Svanasana
From the Table Pose (the set-up of Cat-Cow), tuck your toes under and extend the back leg up.
Spread the fingers wide with a firm grip on the floor.
Extend the spine long, and the buttocks lift.
Keep the spine long and straight, and bend your knee to adjust the spine's elongation.
Step 8: Three-Legged Dog - (Tri Pada Adho Mukha Svanasana)

Three-Legged Dog - (Tri Pada Adho Mukha Svanasana)
From Downward Facing Dog in Step 7, bring the feet together. Knees can remain bent.
Extend the right leg up without putting pressure on the upper body.
Step 9: Low Lunge (Anjaneyasana)

Low Lunge (Anjaneyasana)
From Three-Legged Dog in Step 8, step the right foot forward between the palm.
The body comes all the way up with arms reached up.
Maintain the pose.
Step 10. Half Forward Bend - Ardha Uttanasana

Half Forward Bend - Ardha Uttanasana
From Step 9, step the left foot forward into a standing forward bend.
Lift head halfway.
Elongate the spine.
Keep knees slightly bent at a comfortable level.
Step 11: Standing Forward bend (Uttanasana)

Dive into a standing forward bend with your knees bent.
Grab your ankle with your hands.
Bring the belly close to the thighs as much as possible.
Elongate the spine.
Keep neck and head relaxed.
Step 12. Arms Extended in Mountain Pose (Utthita Hastasana in Tadasana)

Arms Extended in Mountain Pose (Utthita Hastasana in Tadasana)
Slowly coming up to a standing pose.
Reach arms up, chest slightly lifted.
Step 13: The Prayer Pose (Pranamasana)

The Prayer Pose (Pranamasana)
Bring Palms together into prayer, taking a moment to centre the mind and body.
Keep breathing slowly and gently.
Step 14: Back to Mountain Pose.

Return to mountain pose and feel the breath and circulation running inside the body.
Stay a moment of peace.
Repeat Steps 1-12, but start by stepping the left leg back this round.
Conclusion
In conclusion, Sun Salutation is a fundamental sequence in yoga that helps build strength, flexibility, and mindfulness. It may seem challenging at first, but with consistent practice and modifications, beginners can eventually master it and enjoy its beauty. Remember to breathe deeply and move along with the rhythm of your breath.
More Yoga Blogs


Butterfly Pose: Steps, Techniques and Benefits
The Yoga Butterfly Pose or the Bound Angle Pose, known as बद्धकोणासन (Baddha Koṇāsana) in Sanskrit, is a familiar hip opening pose in yoga practice.
In Sanskrit, Baddha means grasping and limiting; Kona means angle (degree); and Asana means posture or action. The butterfly pose also has an interesting name: the Cobbler Pose. In India, shoemakers sit on the roadside in the butterfly pose to mend their shoes, hence the name.
Butterfly Pose is an easy-to-learn movement, perfect for beginners. Though the movement is simple, it has tremendous physical benefits both for men and women. This article will introduce its techniques and benefits.
Introduction of Butterfly Pose (Koṇāsana):
The Yoga Butterfly Pose or the Bound Angle Pose, known as बद्धकोणासन (Baddha Koṇāsana) in Sanskrit, is a familiar hip opening pose in yoga practice.
In Sanskrit, Baddha means grasping and limiting; Kona means angle (degree); and Asana means posture or action. The butterfly pose also has an interesting name: the Cobbler Pose. In India, shoemakers sit on the roadside in the butterfly pose to mend their shoes, hence the name.
Butterfly Pose is an easy-to-learn movement, perfect for beginners. Though the movement is simple, it has tremendous physical benefits both for men and women. This article will introduce its techniques and benefits.

Butterfly Pose or the Bound Angle Pose, known as बद्धकोणासन (Baddha Koṇāsana) in Sanskrit
Butterfly Pose Steps, Methods and Techniques
In steps 1 to 4, you learn to set up the pose and prepare the body for a deeper stretch.
Step (1)
Start by sitting up. Open your legs and bend your knees. Place the soles of your feet against each other.
Step (2)
Grasp your feet with both hands, keeping your back straight and your heels closer to your perineum without straining your knees and hips.
Step (3) - Butterfly Pose Warm Up
Gently move your knees up and down for about 1-3 minutes as a warm-up to help relieve tightness in your waist and hips.
Step (4) - Take A Short Break
After warming up, you can straighten your feet and relax.
In steps 5 to 10, you learn to get deeper into the pose and exit the pose.
Step (5)
Bend your knees again, place the soles of your feet against each other, getting ready for the butterfly pose stretch.
Step (6) - Getting Deeper Into The Pose
Inhale, straighten your back.
Exhale, bend your body forward.
Inhale, lengthen the back again while folding forward.
Exhale and sink a little bit deeper without rounding your back. Place your elbows on your thighs.
Step (7) - Stay In The Pose.
Keep adjusting the pose with deep inhalation and exhalation. Stay for about 5-10 breaths without straining any part of the body.
Step (8) - Exiting the pose.
When completing the movement, inhale, rise, and slowly sit up straight. Then, exhale completely.
Step (9)
Release your legs and shake them to regenerate their circulation.
Step (10) - Counter Pose
For counter pose, you can consider any gentle yoga pose, such as standing movements, forward bending, or twisting.
The Simplified Version Of Butterfly Pose
If you cannot bend forward completely, you can straighten your hands, place your forehead on the yoga blocks, relax and stay in the final pose.

The Anatomy behind Butterfly Pose
Benefits Of Practising Butterfly Pose
The Butterfly Pose has many benefits and can benefit both male and female practitioners. According to the Light of Yoga by B.K.S Iyengar, here are some benefits.
General Benefits of Butterfly Pose:
Suitable for people suffering from urinary disorders to relieve discomfort;
It may stimulate the pelvis, abdomen and back during stretching and enhance blood circulation;
Butterfly pose may relieve sciatic pain and prevent hernia.
Benefits Of Practising Butterfly Pose For Women:
Regulate menstrual cycle. The effect will be even greater when combined with the shoulder stand (Salamba Sarvangasana).
Pregnant women practising butterfly poses daily may help reduce labour pain and prevent varicose veins.
Benefits Of Practising Butterfly Pose For Men:
Regular practice may help keep the kidneys, prostate and bladder healthy;
Relieve testicular pain and heaviness;
An interesting saying suggests that Indian shoemakers rarely suffer from urinary tract problems, presumably because they work in the butterfly posture all day.

An interesting saying suggests that Indian shoemakers rarely suffer from urinary tract problems, presumably because they work in the butterfly posture all day.
Conclusion
In conclusion, the Butterfly Pose, also known as Baddha Koṇāsana, offers a range of physical benefits for both men and women. Its gentle hip-opening stretches make it suitable for beginners, and its potential to stimulate blood circulation and relieve discomfort makes it a valuable addition to any yoga practice. Whether you are seeking relief from sciatic pain, aiming to regulate your menstrual cycle, or looking to enhance the health of your kidneys and prostate, the Butterfly Pose offers a range of benefits worth exploring. Incorporating this pose into your routine can promote physical well-being and harmony.