Your Custom Text Here
Benefits and Four Tips to Master One-Legged King Pigeon Pose (Eka Pada Rajakapotasana)
The King Pigeon Pose, or the Royal Pigeon Pose (Eka Pada Rajakapotasana), is an energizing pose that stretches the shoulders and vertebral column deeply. It also helps regulate the hormonal secretions, particularly those from the thyroid.
Master King Pigeon Pose (Eka Pada Rajakapotasana)
The King Pigeon Pose, or the Royal Pigeon Pose (Eka Pada Rajakapotasana), is an intermediate to advanced level yoga backbend pose. In this pose, the chest is fully opened like a pigeon. Eka means one, Pada is leg or foot, and Kapota is a pigeon. Rajakapota means the king of pigeons. Hence the name of the pose.
The Benefits of One-Legged King Pigeon Pose (Eka Pada Rajakapotasana) and Backbend
Practising backward bends brings great steadiness to the body, giving an excellent backward opening to the spine and strengthening the back muscles. Backwards Bends cure pain and discomfort due to poor postures, including hunchback, round shoulders, Teck Neck (also known as “text neck” or “screen neck”), back pain etc.
King Pigeon includes all the benefits of the backbend and also includes the following,
The posture stretches the shoulders deeply, allowing the joints to explore mobility, including the shoulder joints, elbow, wrist and small joints at the fingers.
Stretches the vertebral column and the muscles along the spine.
The posture stimulates hormonal secretions of the body, particularly those from the thyroid.
The hip muscles are stretched with an external hip opener in the front leg.
Overall, the One-Legged King Pigeon is an incredible pose that opens the body deeply from head to toe. The opening effect on a backward bend and hip opening is beneficial to regulate modern-day poor postures.
Backwards Bends cure pain and discomfort due to poor postures, including hunchback, round shoulders, Teck Neck (also known as “text neck” or “screen neck”), back pain etc.
The Preparation and Counter Pose of One-Legged King Pigeon (Eka Pada Rajakapotasana)
One-Legged King Pigeon is a deep backward bend, and advanced yogis can go deep into the pose. Before attempting the pose, make sure you properly warm up your body and joints. Prepare your body for sufficient shoulder-opening sequence and spinal mobility movement. >> Practice On YouTube: 30 mins Shoulders and Spinal Mobility
Counter Pose: Seated Forward Bend (Paschimottanasana)
Come out from the pose slowly with steady breathing. After the pose, counter the practice with gentle twisting or forward bend. The counter poses include the following,
Head-To-Knee Pose (Janu Sirsasana)
Seated Forward Bend (Paschimottanasana) - Click HERE to Practice on YouTube
FOUR Tips To Master One-Legged King Pigeon (Eka Pada Rajakapotasana)
Always keep in mind that practising yoga is not just about physical performance but also about the linkage between the mind and soul. Connecting with your mind and breath is vital when practising advanced yoga posture.
You must train your mind to concentrate and be conscious with every breath. These are the foundations for safe and effective practice.
Be Patient. Rotate your shoulder properly to grip.
Listen to your body. Align your spine to open your chest.
Centre your mind. Find your perfect balance.
Connect with your soul. Breathe and explore.
Keep up the practice, and let me know how it goes. Email me at info@cloudcyoga.com. I am always excited to read your emails.
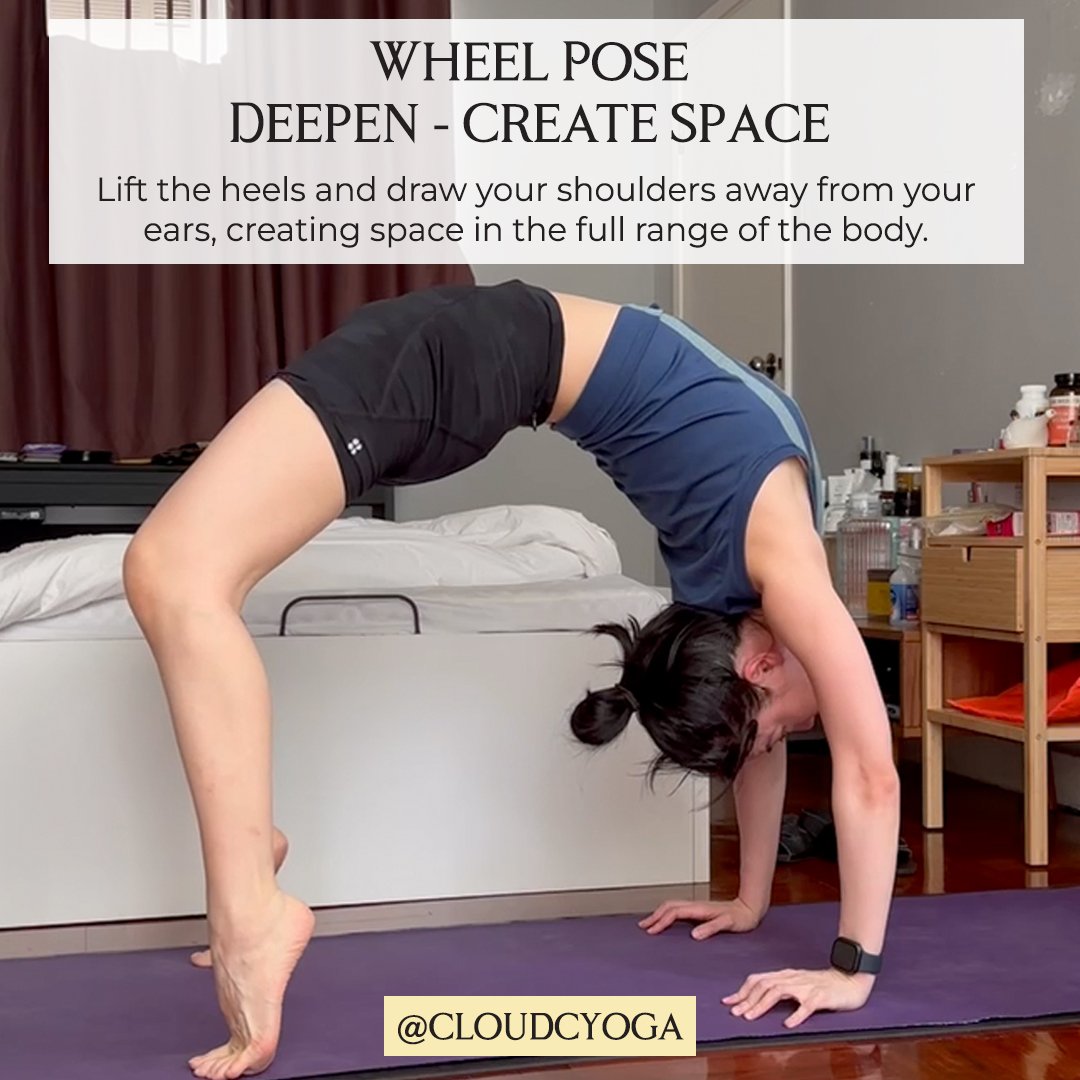
Wheel Pose (Urdhva Dhanurasana): Restore spinal curve and help with Hunchback
Explore the benefits and techniques of Wheel Pose (Urdhva Dhanurasana) with our comprehensive guide. Learn proper alignment, safety precautions, and how to experience the incredible yoga pose.
Wheel Pose, also called Urdhva Dhanurasana in Sanskrit, is an excellent backbend that engages every muscle in the body. It opens the front of the body while strengthening the back body.
This article will cover this beautiful yoga pose's essential preparation steps, alignment, safety, and benefits.
Preparation: Get your body ready for Wheel Pose (Urdhva Dhanurasana)
Proper Warm-Up: Before attempting the Wheel Pose, warm up your body with full-body opening practice. It's always best to include several rounds of Sun Salutation and another warm-up sequence focusing on the spine, shoulders, and hips. Think of it as awakening your muscles and preparing them for this dynamic posture.
Building Strength and Flexibility: A strong foundation is critical. Strengthen your back, shoulders, and core with exercises like Cobra Pose (Bhujangasana), Plank Pose, and Bridge Pose (Setu Bandhasana). These poses will help you build the strength and flexibility you need for Wheel Pose.
Steps: Getting into Wheel Pose (Urdhva Dhanurasana)
Lift Your Hips: Press through your feet and lift your hips up to create an arch with your back.
Deepen with Heels Up: Lift the heels and draw your shoulders away from your ears, creating space in the full range of your the body.
Start on Your Back: Lie on your back on the floor. Bend your knees and bring your heels to your buttocks, feet hip-width apart. Place your hands under your shoulders, palms down.
Lift Your Hips: Press through your feet and lift your hips up to create an arch with your back.
Half Wheel Pose: Rest the top of the head on the floor; for beginners, consider staying at the Half Wheel Pose as a light version of the Wheel Pose. (See Image or Click HERE)
Straighten Your Arms: Slowly straighten your arms, pushing through your palms to lift your chest up and open your chest.
Creating More Space: To deepen the pose, lift the heels and draw your shoulders away from your ears, creating space in the full range of the body. (See Imageor Click HERE)
General Alignments: Practice Wheel Pose Safely (Urdhva Dhanurasana)
Hands Position: Place your hands under your shoulders, fingers pointing towards your shoulders, and ensure your palms are flat and have a firm grip on the yoga mat.
Chest Opening: While holding the Pose, allow your chest to open and lift.
Spinal Curve: As you lift into Wheel Pose, allow your spine to gently open and explore your natural curve. Do not overly arch your back.
Strong Legs: Engage your quads, hamstrings and hips to support the Pose.
Neck Relaxed: Keep your neck long and relaxed.
Shoulder Space: Draw your shoulders away from your ears to prevent strain on your neck and shoulders.
Safety: Listen to your body
Do not force yourself, especially your lower back. It's common to feel pain and strain in Wheel Pose when the body is NOT open correctly or in proper alignment. Pay attention to the important message that your body is sending you.
Practice Patience: Building strength and flexibility in every yoga pose takes time, and the wheel pose is like no other. Take your time to understand the Pose and practice regularly to equip yourself with the strength and flexibility you need for this Pose.
General Benefits of Practising Wheel Pose
Release Shoulder Tightness and Hunchback: Wheel Pose focuses on opening the upper body and building strength for the entire spine. By alleviating tension in the back, it also provides an opportunity for individuals with hunchbacks to restore a healthy curvature of the spine.
Breathe Better: Regular backend practice, such as wheel pose, may improve shortness of breath as it opens more space in the upper body, especially the chest and ribcage.
Healthy Spinal Curve: Proper backbend practice, such as Wheel Pose, is beneficial for neutralising the spinal curve and restoring balance to a hunched spine, a common condition of modern sedentary lifestyles.
Enhance Strength: Wheel Pose strengthens the muscles in your back, shoulders, and legs.
Better Circulation and Energy: Yoga backbends, such as Wheel Pose, can boost blood flow to the brain, improving circulation.
Enhance Focus and Concentration: As you must be fully present when attempting this muscular Pose, your concentration level will be cultivated over time.